

Setup ShipBob Returns
ShipBob Returns gives your customers a self-service returns portal and gives you a dashboard to review every return and exchange request. This guide walks through the full setup flow, from first sign-in to sharing your live portal with customers. Most merchants can complete setup in about 20 minutes.
Before You Begin
Make sure you have:
- A ShipBob account with Merchant Portal access
- A Shopify store and Shopify admin credentials
- A brand logo to upload to the portal
- A ShipBob Personal Access Token (PAT), or permission to create one during setup
- Optional access to your DNS provider if you want to use a custom returns domain such as
returns.yourbrand.com
What ShipBob Returns Does
Once configured, ShipBob Returns is built to do two things well: stay tightly integrated with Shopify and automate repetitive returns work.
- Sync order, SKU, and return data between Shopify, ShipBob Returns, and ShipBob so your team does not have to reconcile systems manually
- Let customers start returns through a branded self-service portal tied to your Shopify order data
- Create return orders (RMAs) in ShipBob and generate return labels automatically
- Route returns back to the correct fulfillment center
- Automate approvals, rejections, notes, and exception handling with Flows
- Trigger refund automation when your configured conditions are met
- Offer refunds and exchanges based on your return policy (replacement and store credit are coming soon)
Recommended Setup Order
For the smoothest launch, complete setup in this order:
- Sign in to ShipBob Returns
- Connect your Shopify store
- Brand the portal and email experience
- Add your ShipBob Personal Access Token
- Confirm where returns should be routed
- Configure your return policy, return window, and return reasons
- Set up Flows for any automation or special handling you need
- Submit one test return before sharing the portal publicly
- Share your returns portal with customers
Step 1: Sign In
- Log in to ShipBob the way you normally do, at https://web.shipbob.com/app/merchant/#/dashboard.
- In a new tab, go to returns.shipbob.app and click Continue with ShipBob.
- Scroll down and click Allow and Install to authorize ShipBob Returns.
The first person from your organization may be asked to accept the Beta Application Terms of Service. This only needs to be completed once per organization.
Step 2: Connect the Shopify App
- Click Connect to Shopify.
- Install the ShipBob Returns app when Shopify prompts you.
Once connected, you land back on the Returns page.
This connection allows ShipBob Returns to read order data from Shopify so customers can look up purchases, confirm item eligibility, and start a return using the details on their order.
Step 3: Brand Your Returns Portal
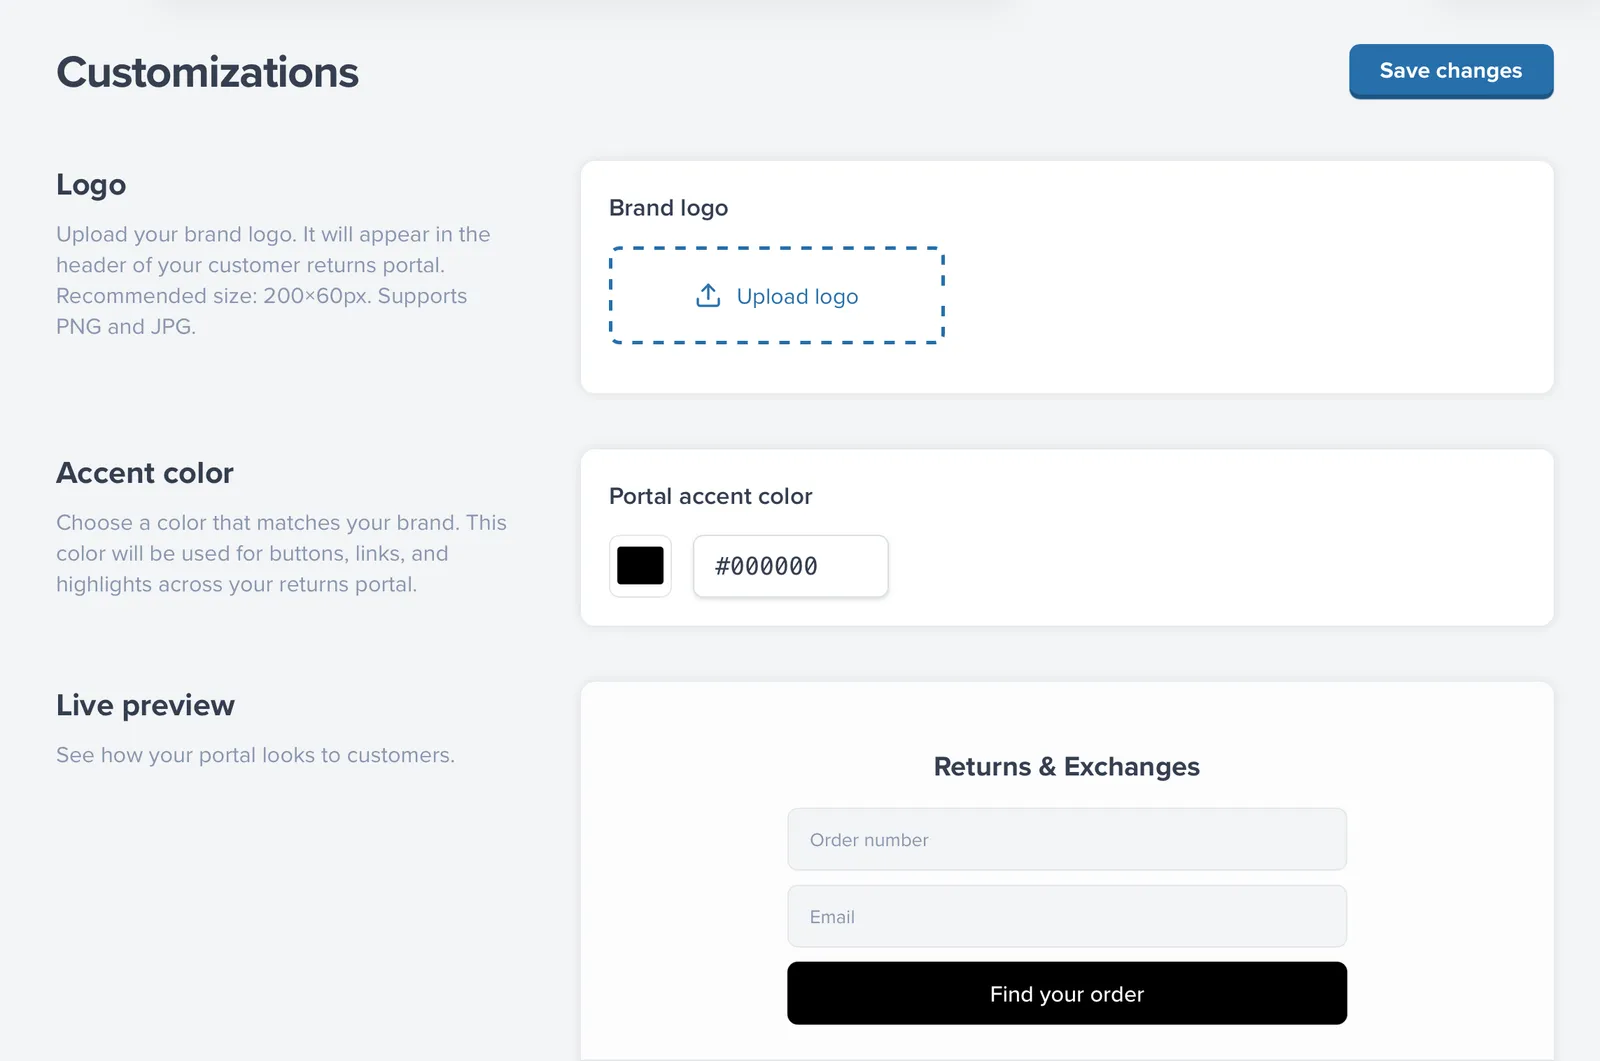
Go to Customizations to make the portal match your brand:
- Logo and favicon uploads
- Accent color (hex code) used for buttons and highlights
- Company name and header text shown at the top of the portal
Your returns portal is live at:
where your-store is your store’s name. You can preview it anytime from the dashboard.
Use Your Own Domain (recommended)
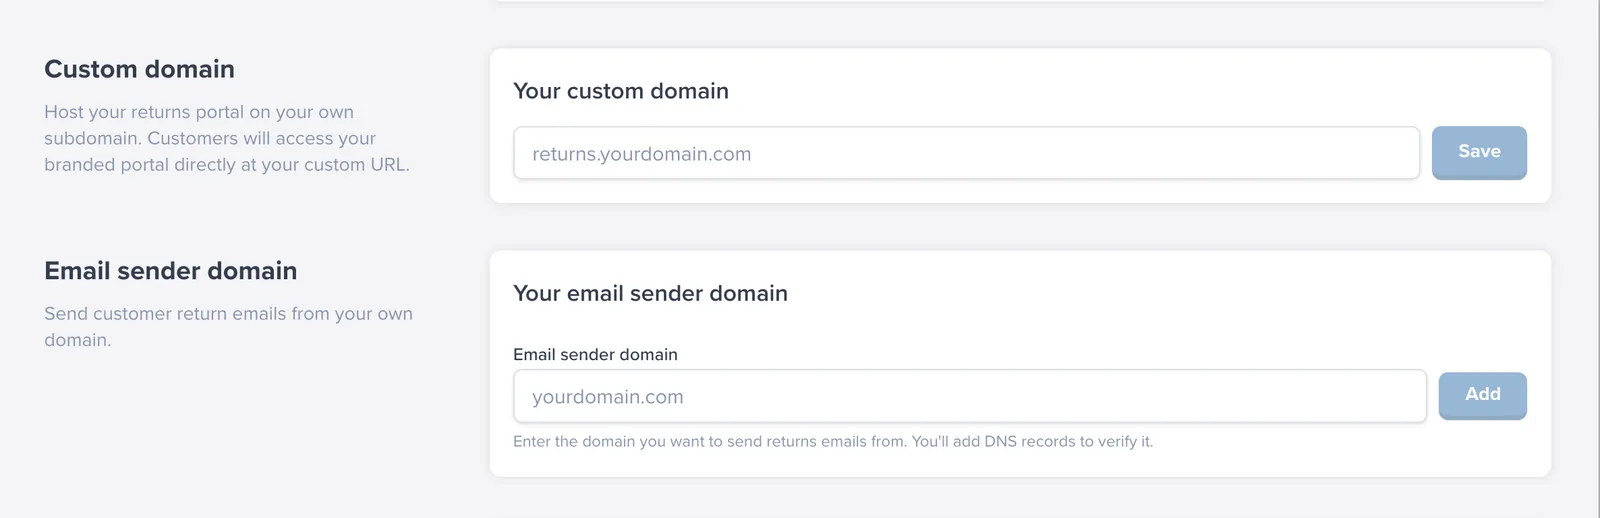
If you would like customers to see a domain like returns.yourbrand.com:
- In Customizations, enter your domain in Your custom domain.
- Add the CNAME record shown on screen at your DNS provider.
- Click Check status (or Verify DNS) once the record is in place. DNS changes can take a few minutes to propagate.
Once verified, all portal links and customer emails automatically use your custom domain.
Send from your own domain (recommended)
- In Customizations, enter your domain and also your send-from address (for example,
returns@yourbrand.com). - Add the DNS records shown on screen (these authenticate your domain so emails land in the inbox, not spam).
- Verify the records from the same screen.
Step 4: Connect ShipBob with a Personal Access Token
Your ShipBob PAT lets the returns platform create return orders (RMAs), purchase return shipping labels, and track return shipments back to your fulfillment center.
Create the token in ShipBob:
- In the ShipBob Merchant Portal, go to Integrations > API Tokens.
- Create a new Personal Access Token and copy it.
Add the token in ShipBob Returns:
- Go to Settings > Integrations > Personal access token.
- Paste the full token exactly as copied - do not add a “Bearer” prefix or any extra characters.
- Click Save. The token is stored securely and displayed masked from then on.
- Click Test Connection. This verifies the token works and automatically detects your ShipBob channel, so you do not need to look it up manually.
Once the token is saved you are good to go.
Step 5: Choose Where Returns Are Sent
Under Settings, configure your return destination:
- Return to origin warehouse - each return is sent back to the ShipBob fulfillment center that originally shipped the order. This is the recommended option for most merchants.
- Default / backup warehouse - choose a specific ShipBob fulfillment center to receive returns. This is also used as the fallback when the origin warehouse cannot be determined.
If ShipBob Returns cannot determine the original fulfillment center for an order, it uses the backup warehouse automatically. If you want tighter operational control, set the backup warehouse intentionally instead of leaving it as a default choice.
Step 6: Set Your Return Policy
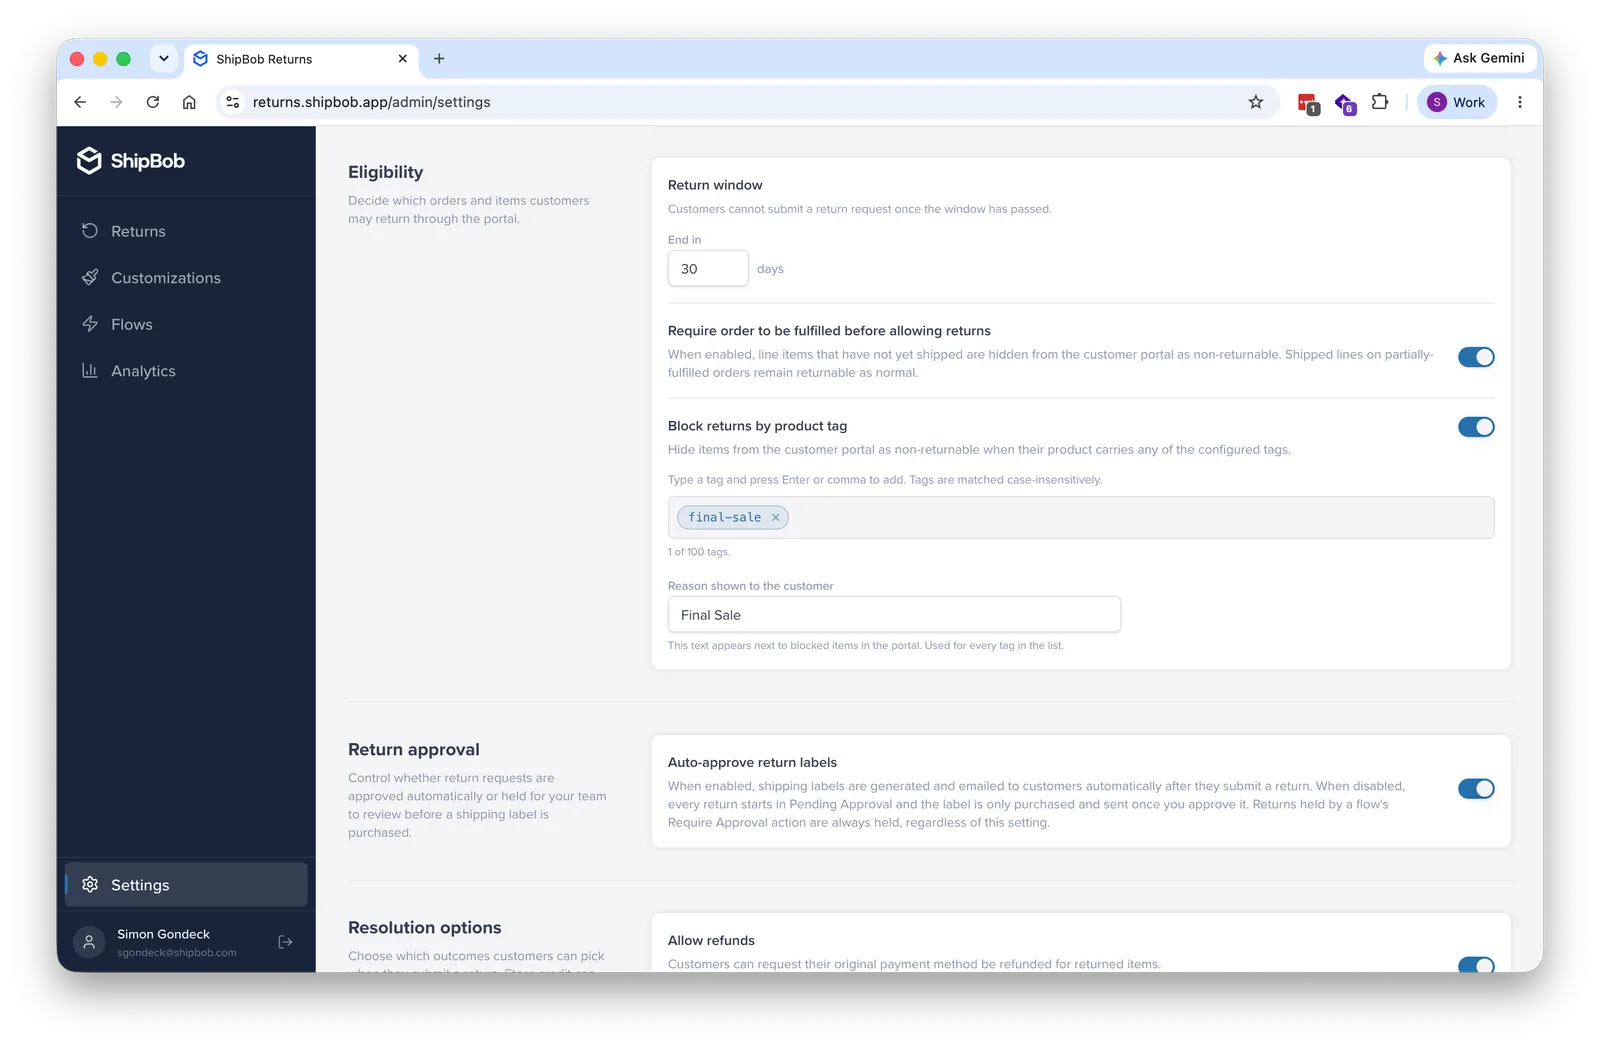
In Settings, review the core return policy options:
For the full policy breakdown, including return reasons, return-window behavior, hazmat handling, and guidance on manual review vs. auto-approval, see Configure Return Policies.
Step 7: Automate with Flows
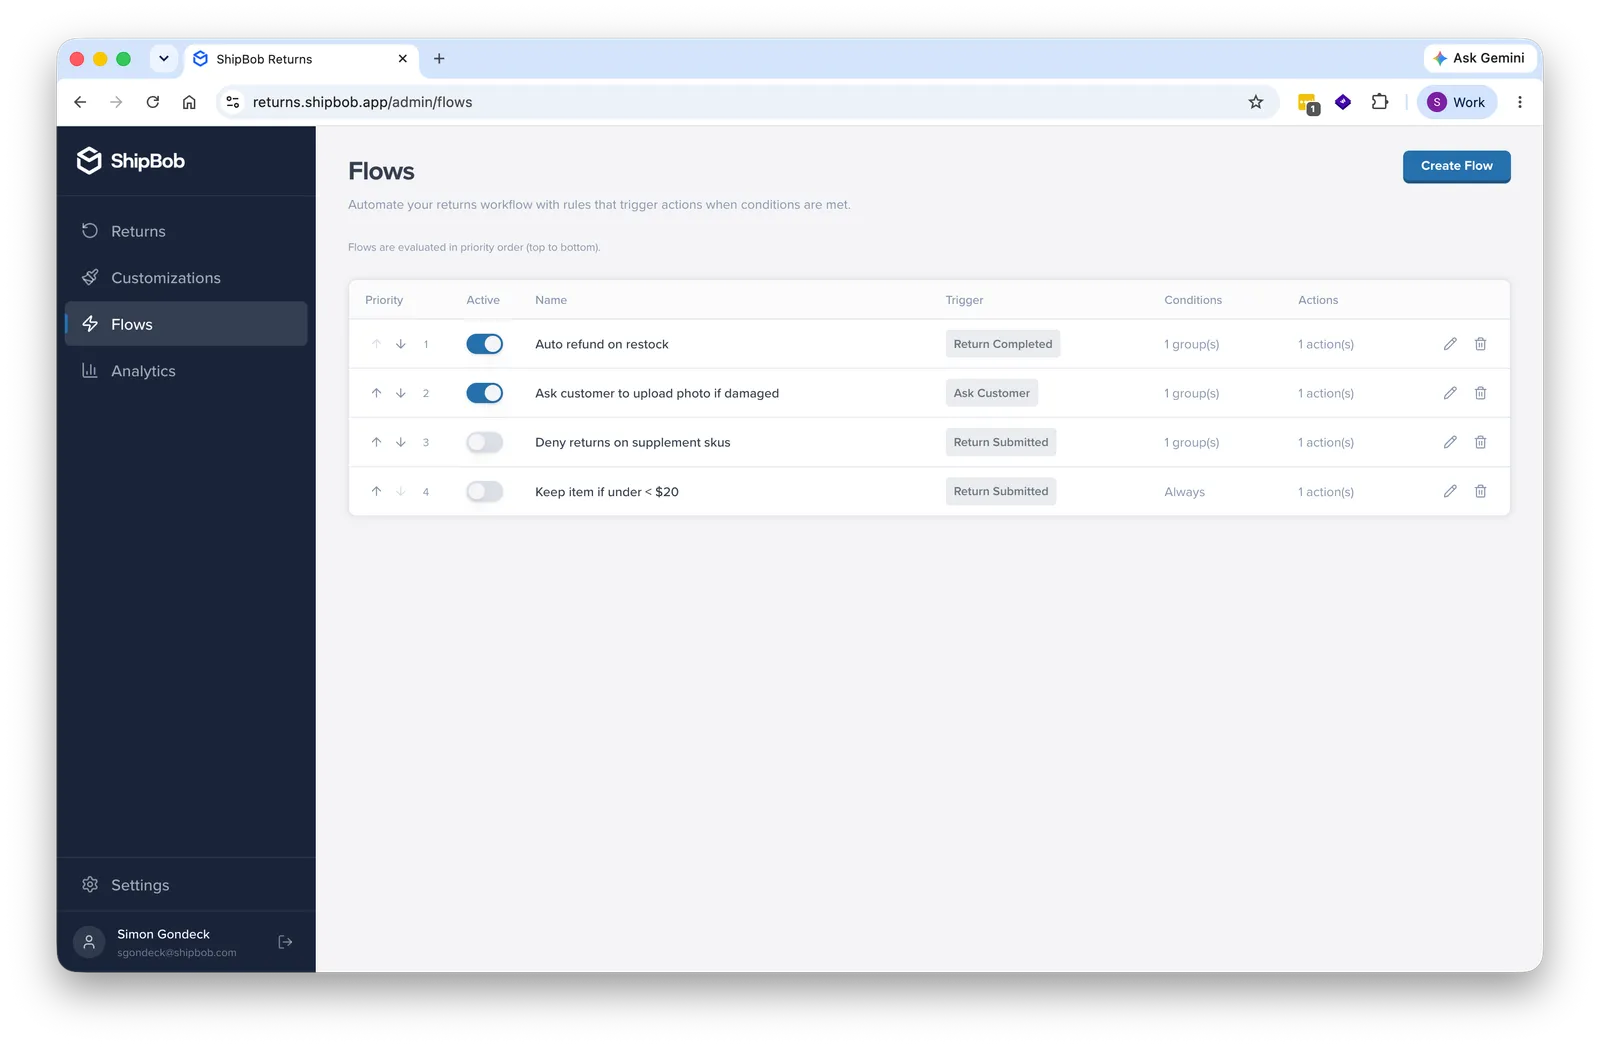
Flows let you automate exceptions that would otherwise require manual review. Use them to:
- Auto-approve low-risk returns
- Auto-reject returns that fall outside your policy
- Route damaged-item claims into approval queues
- Let customers keep low-value items instead of shipping them back
- Trigger automatic refunds when a return is completed
If you do not need special logic yet, you can launch without Flows and add them later.
For setup details, trigger types, evaluation order, and example automations, see Automate Returns with Flows.
Step 8: Test the Full Flow
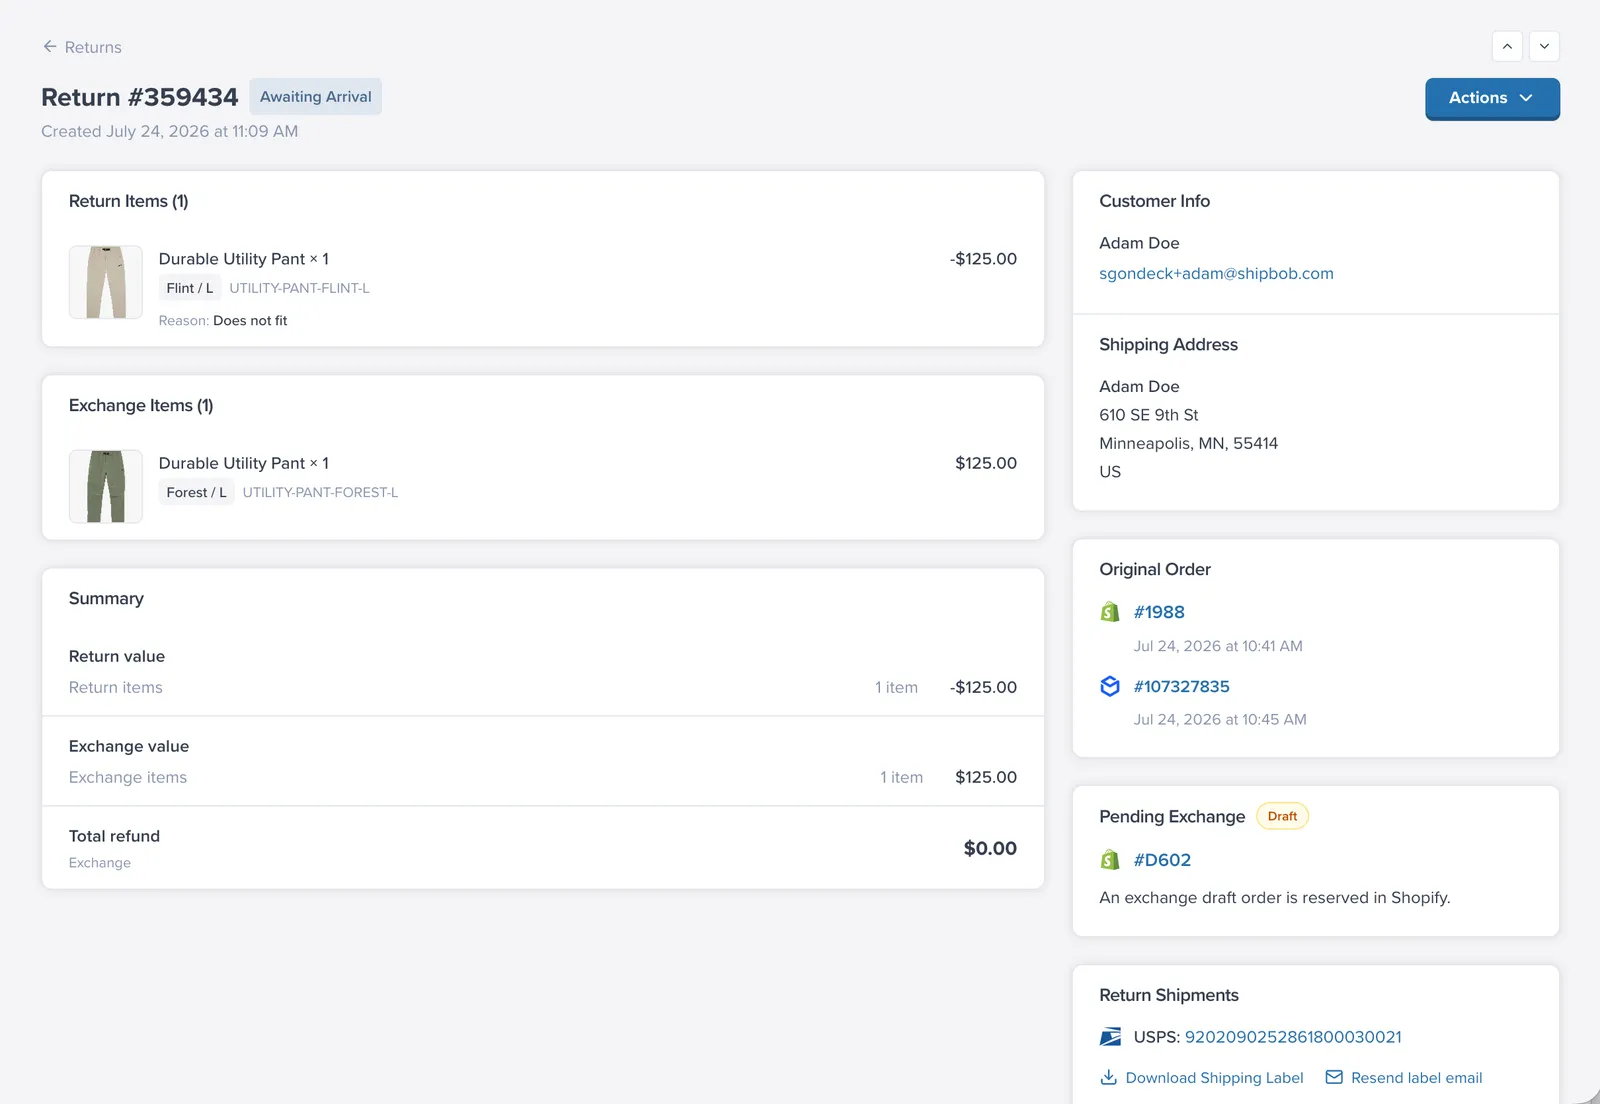
Before sharing the portal with customers, run one return end to end:
- Open your returns portal (
https://your-store.returns.shipbob.app). - Enter a real order number and the email address on the order.
- Select an item, answer any condition questions, and submit the return.
- Confirm the return appears on your Returns page in the dashboard.
- Confirm the label email arrives automatically. If you intentionally disabled auto-approve, approve the return and then confirm the label email arrives.
- Check that the return also appears in your ShipBob Merchant Portal as an RMA.
If you configured any Flows, also test at least one return that should trigger each important rule.
Pre-Launch Checklist
Before publishing your portal broadly, confirm that:
- Shopify is connected successfully
- Your ShipBob PAT passes Test Connection
- Your return routing warehouse is set correctly
- Your return policy, return window, and return reasons reflect your actual business rules
- Your Flows, if any, fire in the order you expect
- Your branding changes appear correctly in the portal
- Your sender domain is verified, if you are using one
- A real end-to-end test return has completed successfully
Optional: Customize Customer Emails
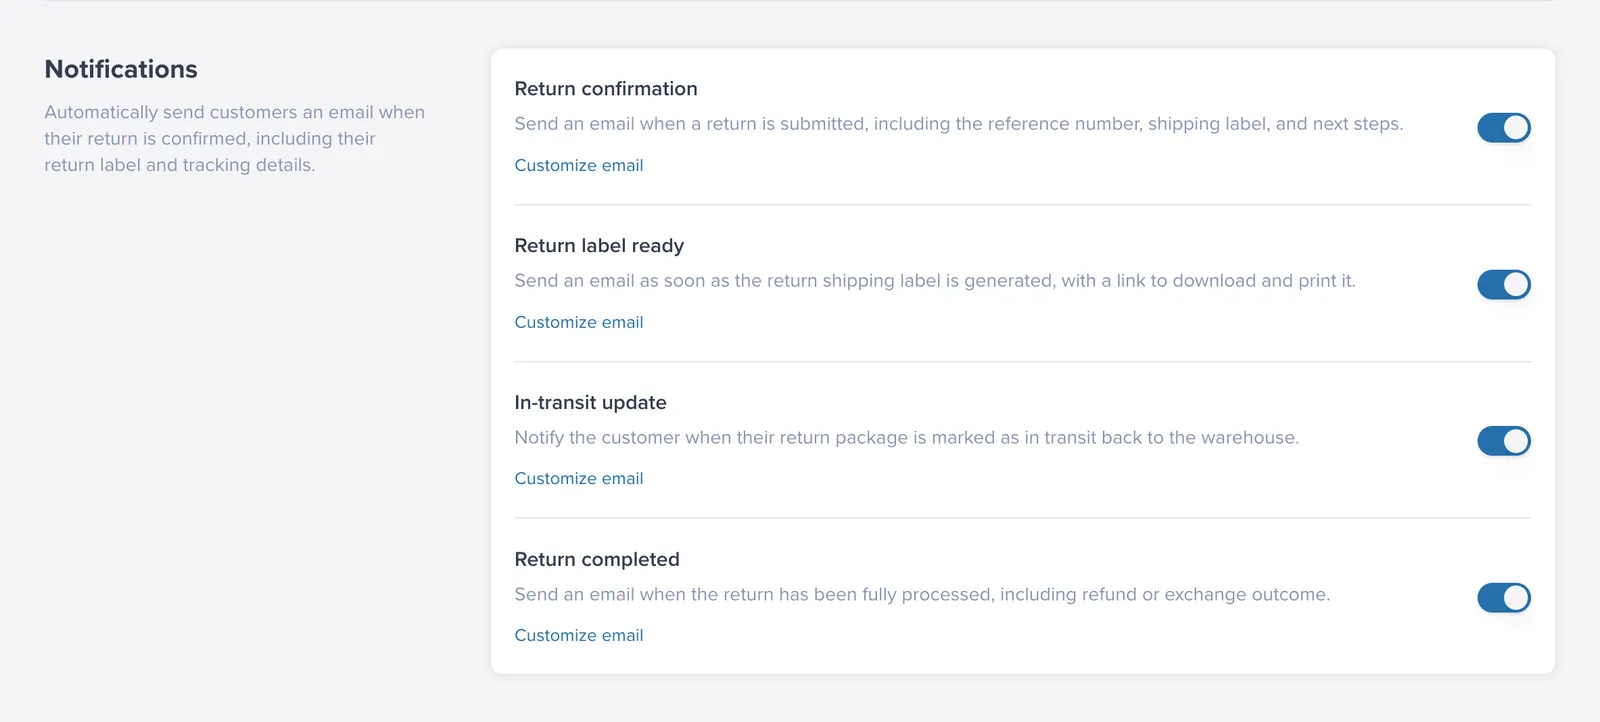
ShipBob Returns emails your customers at each stage of the return: Return received, Label ready, In transit, and Completed.
If you want to go beyond the default templates before launch:
- Open Settings and click Customize next to any email type.
- Edit the subject line, message text, and closing note.
- Use merge fields such as customer name, order number, and tracking link to personalize each message.
- Click Send test email to preview the message in your inbox before going live.
Step 9: Share Your Returns Portal
You are live! Add your returns portal link where customers will look for it:
- Your website footer and FAQ / returns policy page
- Order confirmation and shipping notification emails
- Your Shopify customer account pages
Ongoing Operations
After launch, check the dashboard regularly for:
- Returns waiting in Pending Approval
- SKU matching issues that need an Auto-sync rerun
- Failed or delayed customer email delivery
- Custom-domain or sender-domain verification problems
- Any return-policy or flow changes that should be retested before customers use them
FAQ
Do I need a custom domain before launch?
No. You can launch with the default your-store.returns.shipbob.app domain and add a custom domain later.
What happens if Test Connection fails for the ShipBob token?
Returns cannot be created or routed correctly until the token is fixed. Resolve token permissions or formatting issues before going live.
What is the minimum pre-launch test I should run?
Complete one end-to-end return using a real order, verify dashboard status changes, ensure label delivery, and confirm the RMA appears in the ShipBob Merchant Portal.
Troubleshooting
Products show as 'could not be matched to ShipBob inventory'
Make sure the SKUs in Shopify match the SKUs in ShipBob, then click Auto-sync in Settings > Integrations.
Custom domain will not verify
Confirm the CNAME record matches the value shown on screen exactly and that no conflicting records exist for the same hostname. DNS changes can take up to a few hours to propagate.
Test email did not arrive
Check your spam folder first. If you are using a custom sender domain, make sure all DNS records on the sender domain screen show as verified.
A customer says they can't start a return
Check the return window first. Also confirm the item is not blocked by a non-returnable product tag, an excluded SKU, a hazmat restriction, or an Auto-Reject flow.
Need more help? Contact your ShipBob support representative.