

Managing Returns Day-to-Day
Once your portal is live, the Returns page in the dashboard is where you spend most of your time. This guide covers the daily workflow: finding returns, reviewing requests, approving or rejecting them, adding notes, and handling the occasional label failure.
If you have not finished setup yet, start with Setup ShipBob Returns.
The Returns Queue
The Returns page lists every return, newest first. Across the top, status tabs let you focus on one stage at a time:
When you open the Action Required tab, filter chips narrow it further: All, Pending Approval (new returns waiting for your review), and Label Failure (returns whose shipping label could not be created).
Searching
Use the search bar — Search by name, email, order, or reference… — to find a specific return by customer name, customer email, Shopify order number, or the customer-facing RB- reference number.
Reading the table
Most columns are self-explanatory. The main ones worth distinguishing are:
The Return Detail View
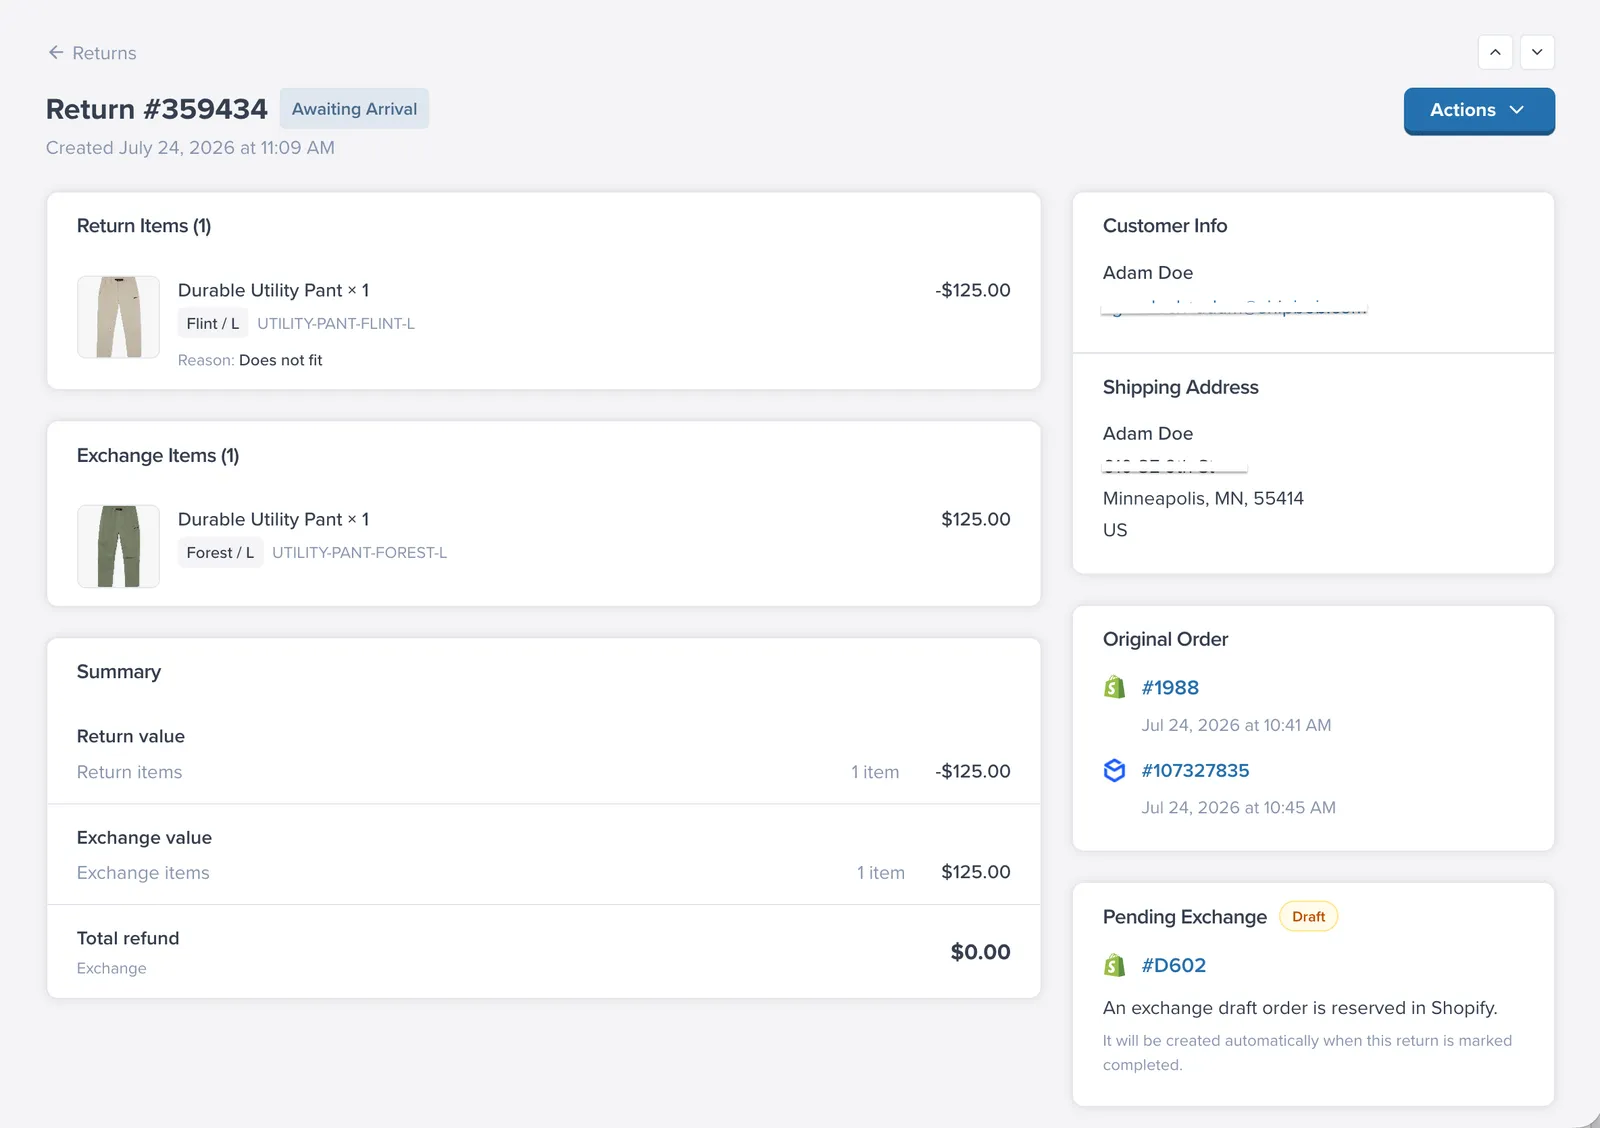
Click any row to open the return. The detail page brings everything about the request into one place:
- Timeline — a visual progress bar through Pending Approval → Awaiting Arrival → In Transit → Arrived → Completed, with timestamps for each step that has happened.
- Items — each item being returned, with the return reason the customer chose.
- Customer responses and photos — answers to condition questions (opened, used or worn, damaged) and any photos the customer uploaded during submission.
- ShipBob RMA info — the RMA ID, the RMA’s current status in ShipBob, and the destination warehouse. This is the same RMA you will see in the ShipBob Merchant Portal.
- Notes — a private section where your team can leave internal comments. Notes are never shown to the customer. Flows with an Add Note action also write here.
Approving and Rejecting Returns
If Auto-approve return labels is off (or a flow routed the return to Require Approval), new returns wait in Pending Approval. From the detail page:
- Review the items, reasons, condition answers, and photos.
- Click Approve to accept the return. ShipBob Returns creates the RMA, generates the shipping label, and emails it to the customer automatically. (An Approve & Complete option is available when no shipment is needed.)
- Or choose Reject Return to decline it. The customer is notified and no label is sent.
Cancelling Returns
- Cancel Return — voids the return and cancels the RMA in ShipBob. Use this when a customer changes their mind or a return was submitted by mistake. If the return included an exchange, the held exchange draft order is removed too.
Handling Label Failures
Occasionally a shipping label cannot be created — most often because the returned item is missing weight or dimensions in ShipBob inventory, or the ShipBob connection has an issue. When that happens:
- The return appears under Action Required > Label Failure, and the detail page shows a red alert with the error.
- Fix the underlying cause. For missing dimensions or weight, update the product in the ShipBob Merchant Portal. For connection problems, re-test your token under Settings > Integrations.
- Click Retry label generation on the return detail page. If the retry succeeds, the label is emailed to the customer as usual.
If the error message mentions inventory that “could not be matched,” run Auto-sync in Settings > Integrations first, then retry.
FAQ
What is the difference between Pending Approval and Action Required?
Pending Approval is a review state before a return is accepted. Action Required is broader and includes items like pending approvals plus operational issues such as label failures.
When should I use Approve & Complete?
Use it when no shipment is required, such as approved keep-item outcomes, so the return can be closed without generating a return movement.
What if retrying label generation still fails?
Recheck product dimensions and weight in ShipBob, run Auto-sync, validate integration credentials, and then retry. Persistent failures should be escalated to support.