Setup
The ShipBob MCP Server is hosted by ShipBob. Setup is the same across every AI app that supports it:
- Open your app’s MCP or connector settings
- Add a new server with the ShipBob URL
- Your app opens a browser window where you sign in to ShipBob
- Grant access on the consent screen
- Start asking the assistant about your data
Server URLs
Use the URL that matches the environment you want to talk to.
What the Consent Screen Asks For
On first connection, ShipBob asks you to create a channel for the AI client and shows the permissions the MCP tools need to function. A channel is how ShipBob tracks which app created which records — it is an installation of an application on top of the ShipBob API, and it controls what the AI client is allowed to write.
- Reads cross channels: The AI client can read data from every channel on your merchant account (orders from Shopify, Amazon, other apps, PAT-issued channels, etc.).
- Permissions follow your account role: The tools available to you depend on your ShipBob account’s permission level. If a tool returns a 403 error, your account role may not have access to that operation — contact your ShipBob account admin to confirm.
- Writes stay in the channel created at consent: Create, update, and cancel operations only apply to records on the channel you created at the consent screen. The AI client cannot write into channels owned by other applications.
403 (or sometimes 404). See Troubleshooting for the full list and how to resolve it.For background on channels, see Concepts > Channel.
Configure Your AI Assistant
claude.ai
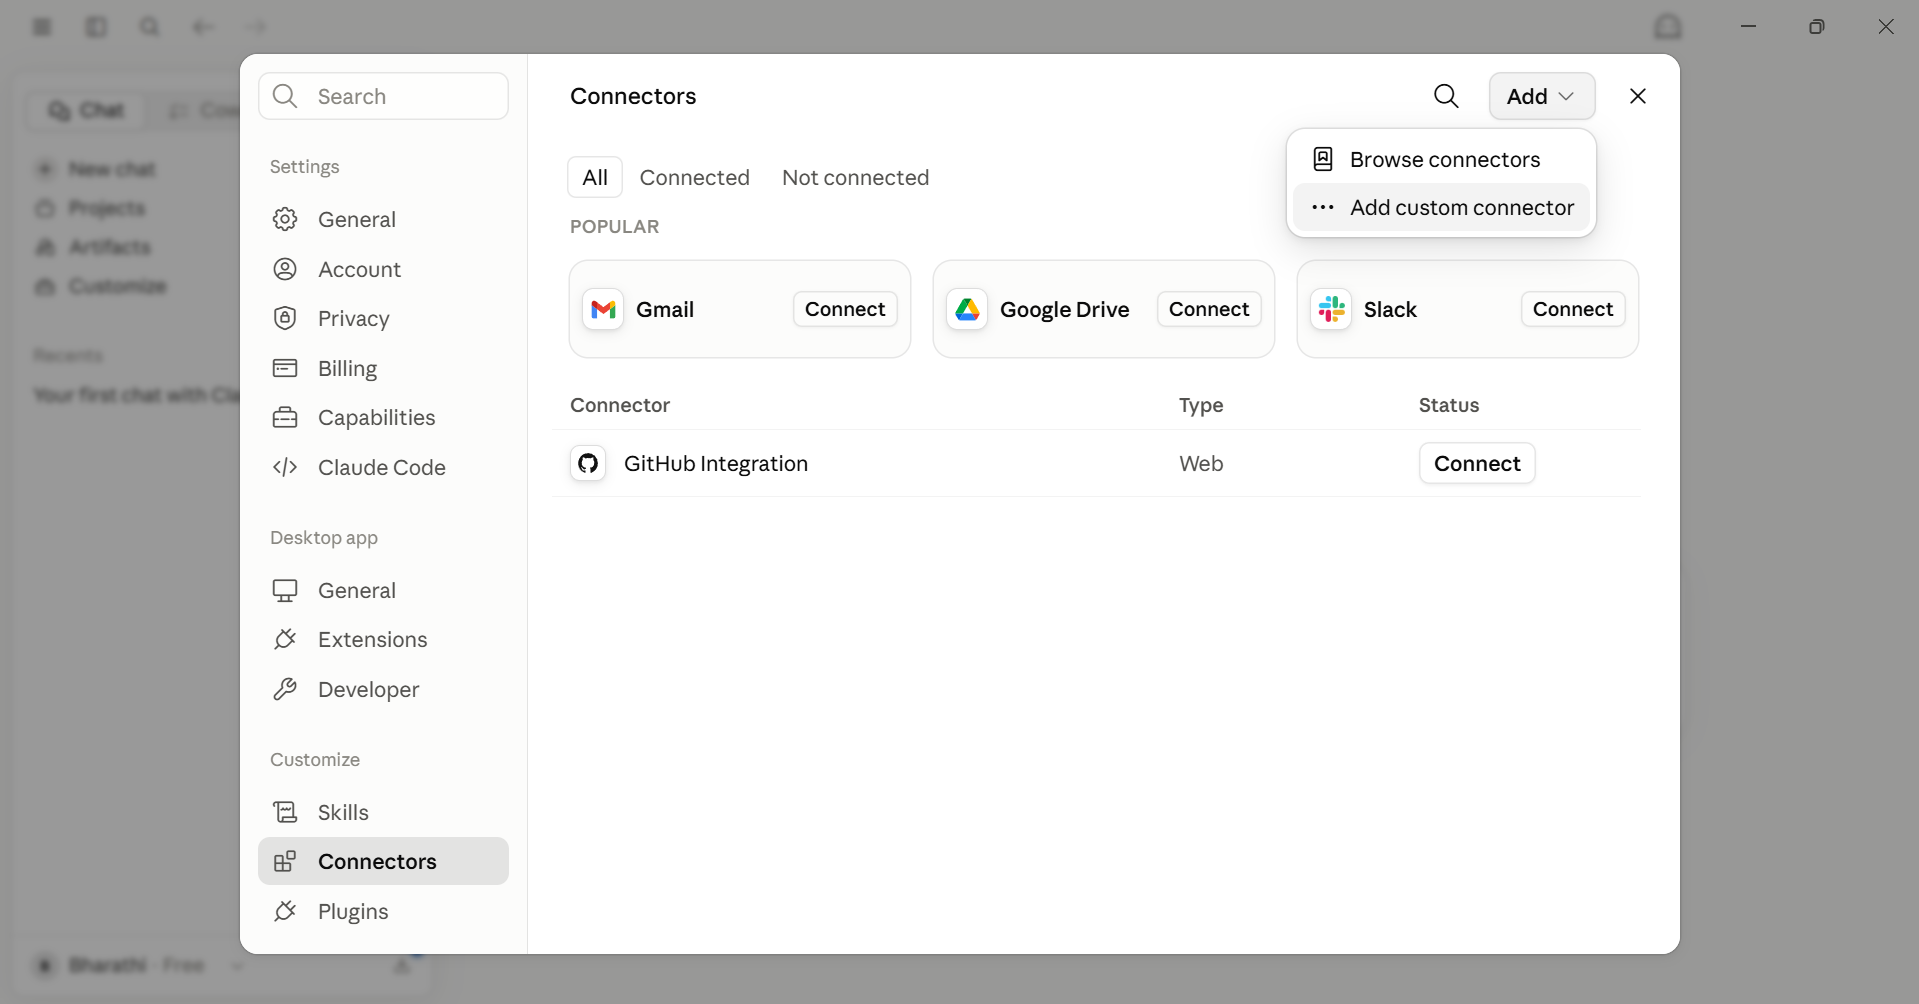
Step 1: Open your Connectors settings
Open claude.ai in your browser. From the sidebar, go to Customize → Connectors.
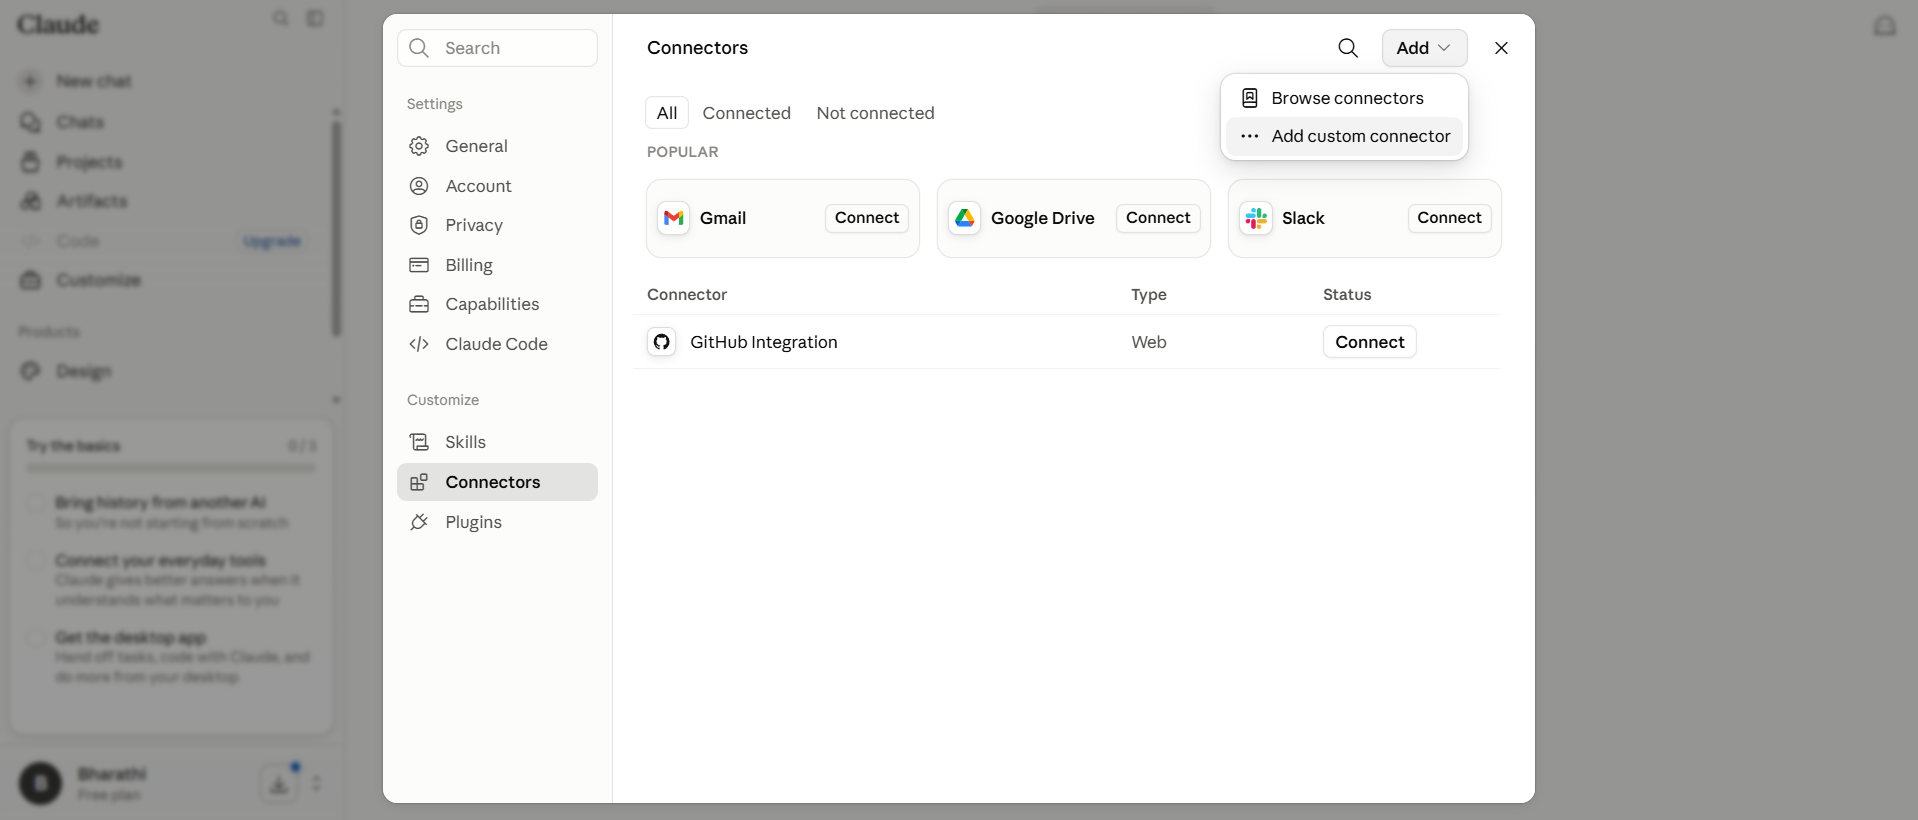
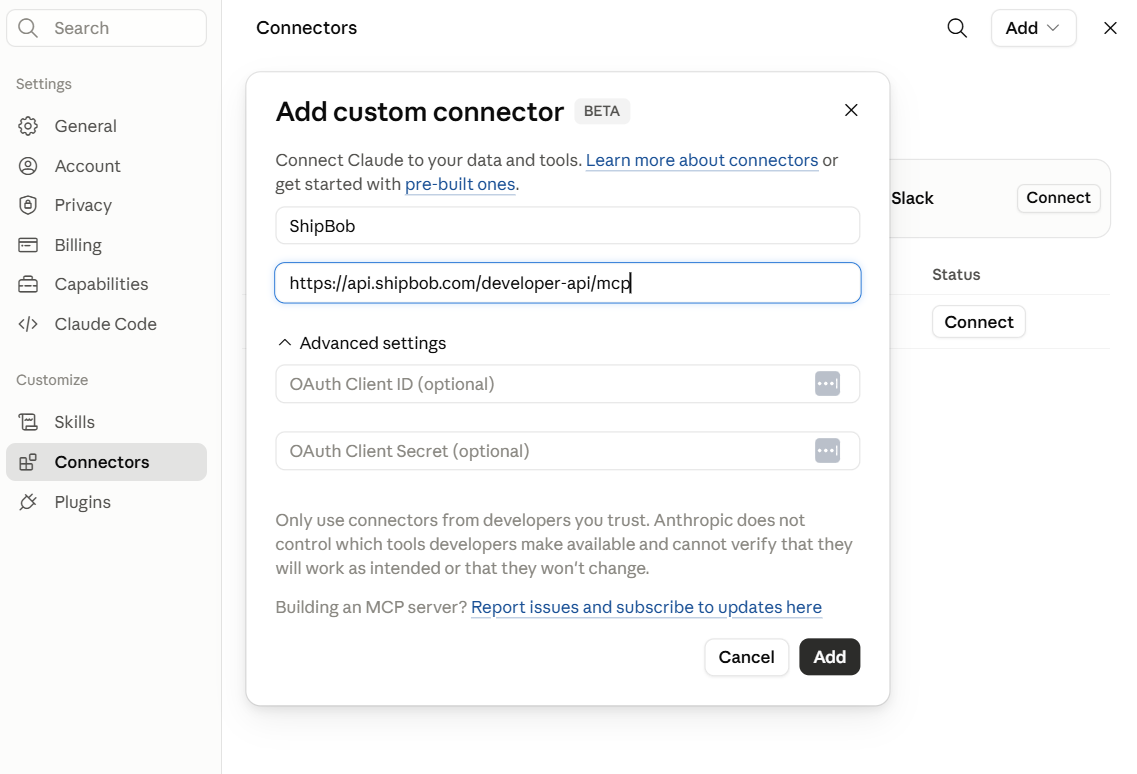
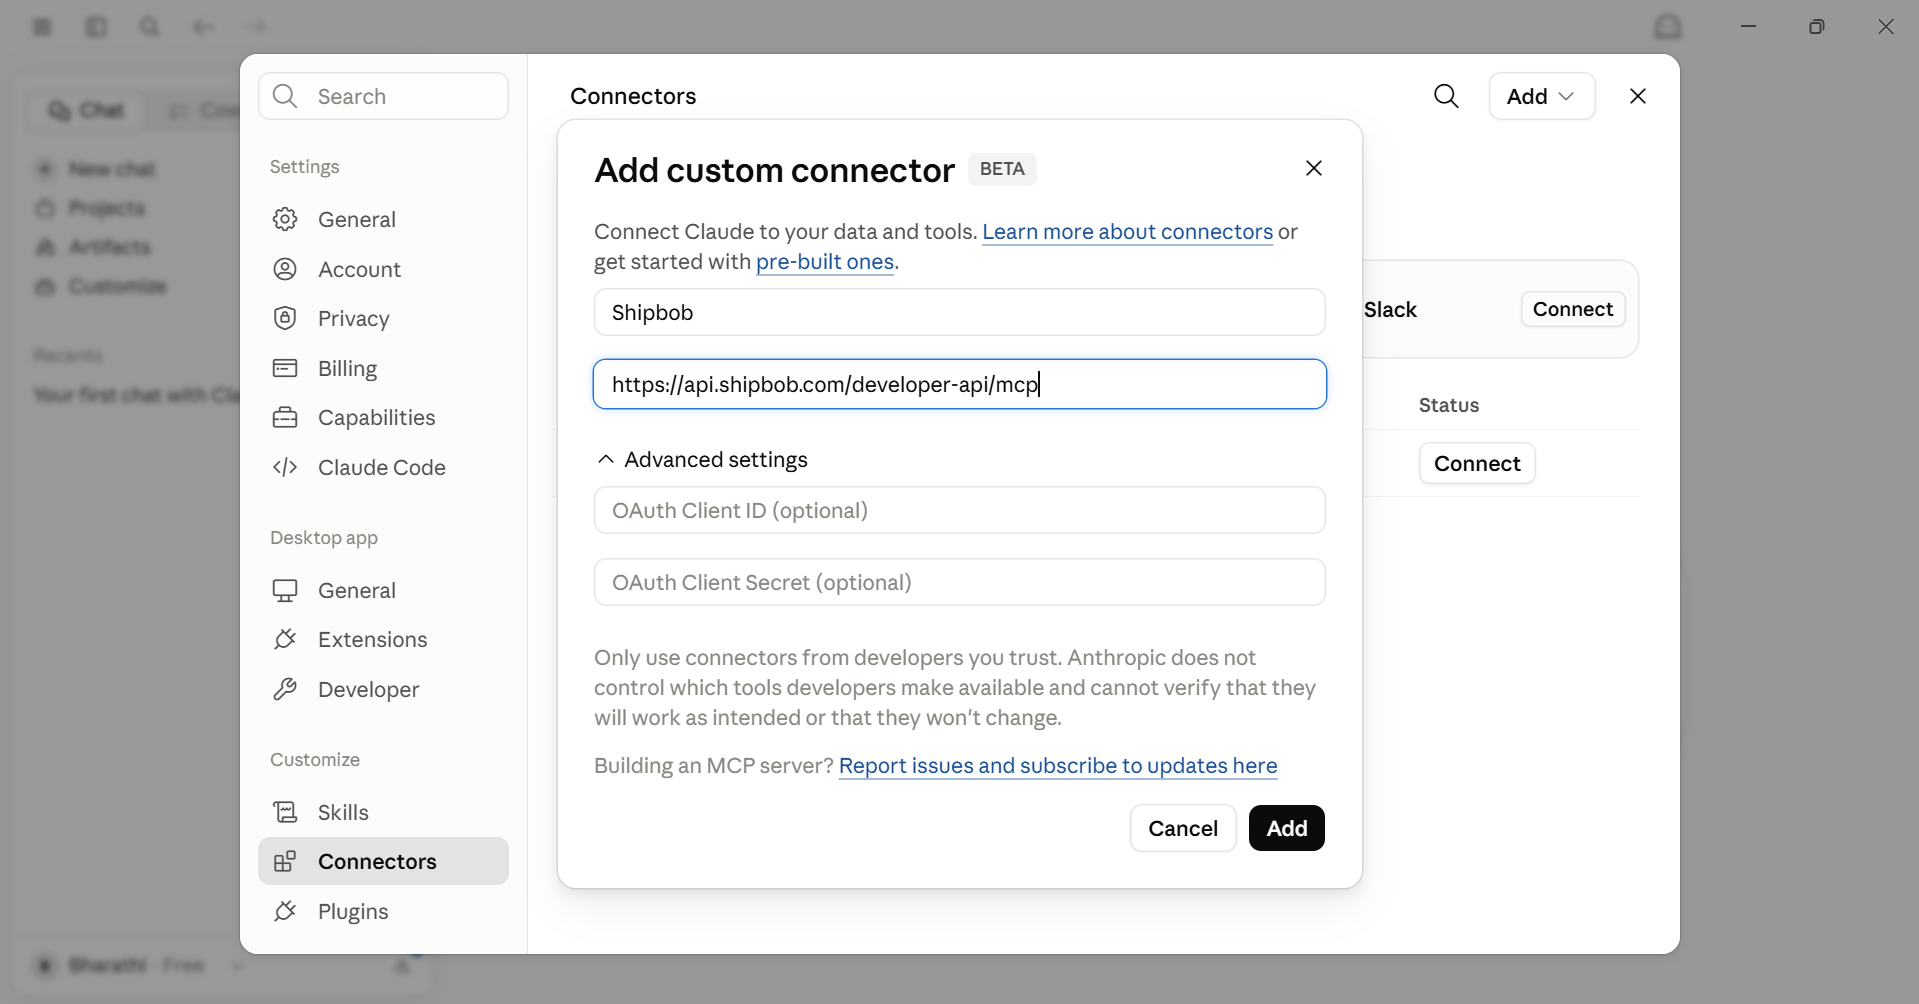
Step 2: Add a custom connector
Click the + icon → Add custom connector. Enter the name ShipBob and paste the server URL for your environment. Click Add.
Or use a direct deep-link:
- Production:
Add ShipBob (Production) - Sandbox:
Add ShipBob (Sandbox)
Step 3: Sign in and grant access
Claude opens a browser tab for ShipBob sign-in. Sign in with your ShipBob account and approve the permissions on the consent screen.
Step 4: Verify the connector is connected
Back in your claude.ai settings, the connector shows as Connected.
ChatGPT
ChatGPT supports remote MCP servers as custom connectors (“Apps”). The flow mirrors claude.ai — paste the ShipBob URL, then sign in through the browser tab ChatGPT opens.
Prerequisites
- A ChatGPT Plus, Pro, Business, Enterprise, or Edu account (custom connectors are not available on Free).
- Developer Mode enabled on your account (see Step 1).
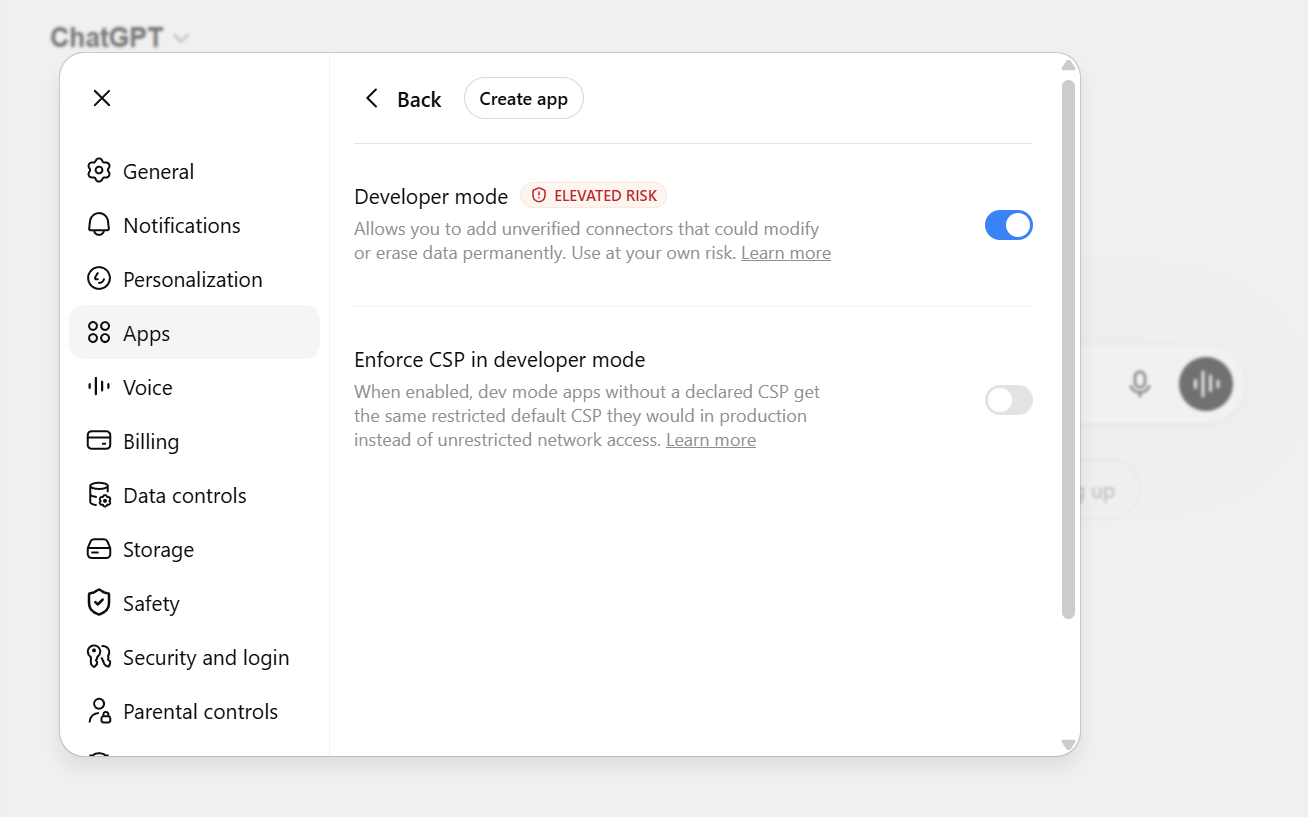
Step 1: Enable Developer Mode
Sign in to chatgpt.com, then open Settings → Connectors (labeled Apps & Connectors on newer accounts) → Advanced settings and toggle Developer mode on.
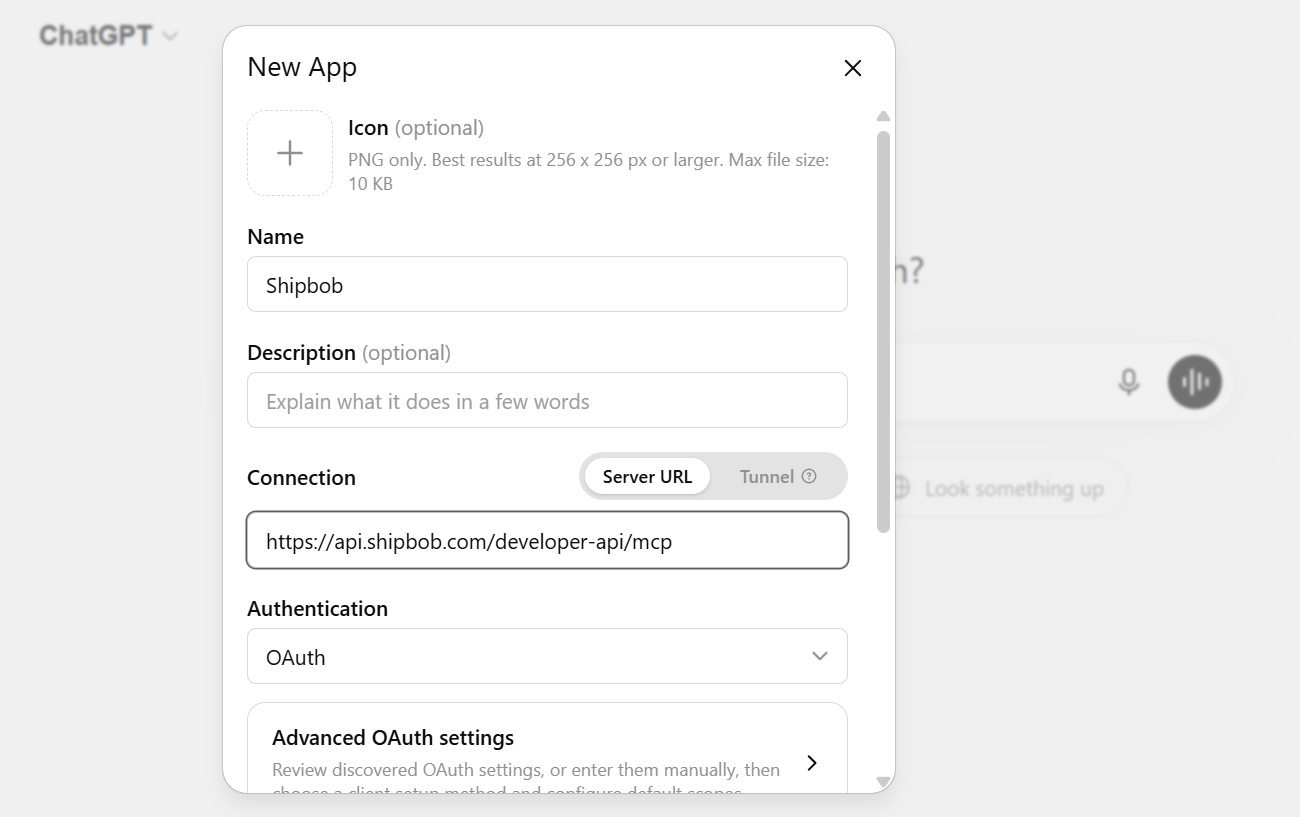
Step 2: Add a custom connector
Back on the Connectors page, click Add (or Create) to add a custom connector. Fill in:
- Name:
ShipBob - MCP Server URL: the URL for your environment
- Authentication: OAuth (leave the default — ShipBob’s server drives the OAuth flow itself, no client ID/secret needed)
Click Create.
Step 3: Sign in and grant access
ChatGPT opens a browser tab for ShipBob sign-in. Sign in with your ShipBob account and approve the permissions on the consent screen. The connector then appears as Connected in your ChatGPT settings.
Step 4: Use ShipBob in a chat
In a chat, open the + (attach) menu, pick ShipBob under connectors, and start asking about your data.
Claude Desktop
Step 1: Open Connectors settings
Open Claude Desktop. From the sidebar, go to Customize → Connectors.
Step 2: Add a custom connector
Click the + icon → Add custom connector. Enter the name ShipBob and paste the server URL for your environment. Click Add.
Step 3: Sign in and grant access
Claude opens a browser window for ShipBob sign-in. Sign in with your ShipBob account and approve the permissions on the consent screen.
Step 4: Verify the connector is connected
Back in Claude Desktop, the connector shows as Connected.
If you don’t see the option to add a custom connector
Register the ShipBob MCP Server by editing Claude Desktop’s config file directly. This uses the mcp-remote helper to bridge Claude Desktop to the hosted server while still keeping the browser-based OAuth sign-in.
Prerequisite — Node.js
The mcp-remote helper runs on Node.js. If you don’t already have it, download and install Node.js (LTS). After installing, open a terminal and run node --version to confirm — you should see a version like v24.15.0.
Steps
-
Open the config file:
- Windows: File → Settings → Developer → Edit Config
- Mac: Claude (menu bar) → Settings → Developer → Edit Config
A file called
claude_desktop_config.jsonopens in your text editor (Notepad on Windows, the default editor on Mac). -
Add the ShipBob server:
Empty config file
File already has other servers
If the file is empty or contains only
{}, replace its contents with:For sandbox, swap the URL for
https://sandbox-api.shipbob.com/developer-api/mcp. -
Save the file and fully quit Claude Desktop (don’t just close the window). Reopen it.
-
On first use of a ShipBob tool, Claude Desktop opens a browser for the ShipBob sign-in / consent screen — same flow as the GUI path.
Claude Code CLI
Claude Code registers MCP servers from the terminal — no config-file editing needed.
Add the ShipBob server (production):
Add the sandbox server:
--transport httpmatches the Streamable HTTP transport the ShipBob server uses.--scope userregisters the server for your user across every Claude Code project. Use--scope project(or omit the flag) if you only want it inside the current project.
The first tool call against the server opens a browser for ShipBob sign-in and the consent screen — the same OAuth flow every other client uses.
Remove the server:
Run claude mcp list at any time to see which servers are registered.
VS Code with GitHub Copilot
Prerequisites
- Latest Visual Studio Code
- Access to GitHub Copilot
One-click install:
Click the link below to add the ShipBob MCP server to VS Code automatically:
- Production: Install ShipBob MCP Server in VS Code
- Sandbox: Install ShipBob Sandbox MCP Server in VS Code
VS Code opens a prompt to confirm the server installation. After confirming, it opens a browser for sign-in.
Manual setup:
-
Choose where the MCP config lives:
- Workspace (
.vscode/mcp.json): use this for project-specific access. Teammates who check out the repo also get the server. - User profile (run
MCP: Open User Configurationfrom the Command Palette withCtrl+Shift+P/Cmd+Shift+P): use this to make the server available across all your projects.
- Workspace (
-
Add the ShipBob server:
Swap the URL for
https://sandbox-api.shipbob.com/developer-api/mcpto point at sandbox. -
Run
MCP: List Serversand startshipbob. VS Code opens a browser for sign-in. -
Sign in with your ShipBob account and grant access.
mcp.json.Other AI Apps
Any app that supports remote MCP servers works the same way:
- Add a new remote / custom MCP server in the app
- Paste the ShipBob URL for your environment
- Sign in to ShipBob in the browser window your app opens
No API tokens, headers, or extra tools are needed.
Verify the Connection
Once the server is added, ask the assistant:
You should see a list of all available ShipBob tools. If nothing appears, see Troubleshooting.
Tool Approval Behavior
Your AI client controls tool approval — the ShipBob MCP Server does not enforce a prompt. Behavior varies:
- claude.ai, Claude Desktop, VS Code with GitHub Copilot — Prompt for confirmation before running write operations (create order, cancel order, etc.); read-only tools typically run without a prompt.
- Claude Code CLI — Follows Claude Code’s per-tool permission rules. Write tools require explicit approval on first use (permission mode
defaultorplan); users can--allowspecific tools to skip the prompt in trusted workflows. - ChatGPT — With Developer Mode connectors, tool calls run without a confirmation prompt by default. Review your ChatGPT connector settings if you need per-call approval for writes, and treat write-capable connectors accordingly.
Regardless of client, all write operations are still constrained to the channel created at consent — records owned by other channels return 403 or 404 when a write is attempted.
Next Steps
- Tools & Examples - See what you can ask
- Troubleshooting & FAQ - Fix common issues
- Setup with API Token - Alternative setup using an API token you generate from your ShipBob dashboard, for apps or workflows that don’t support sign-in through the browser