***
title: Connect Shopify with ShipBob Logistics
description: >-
Follow these steps to configure the Shopify integration with ShipBob Logistics
in your ShipBob account.
sidebarTitle: Shopify
noindex: true
last-updated: 'February 24, 2026'
---------------------------------
## Install the Integration
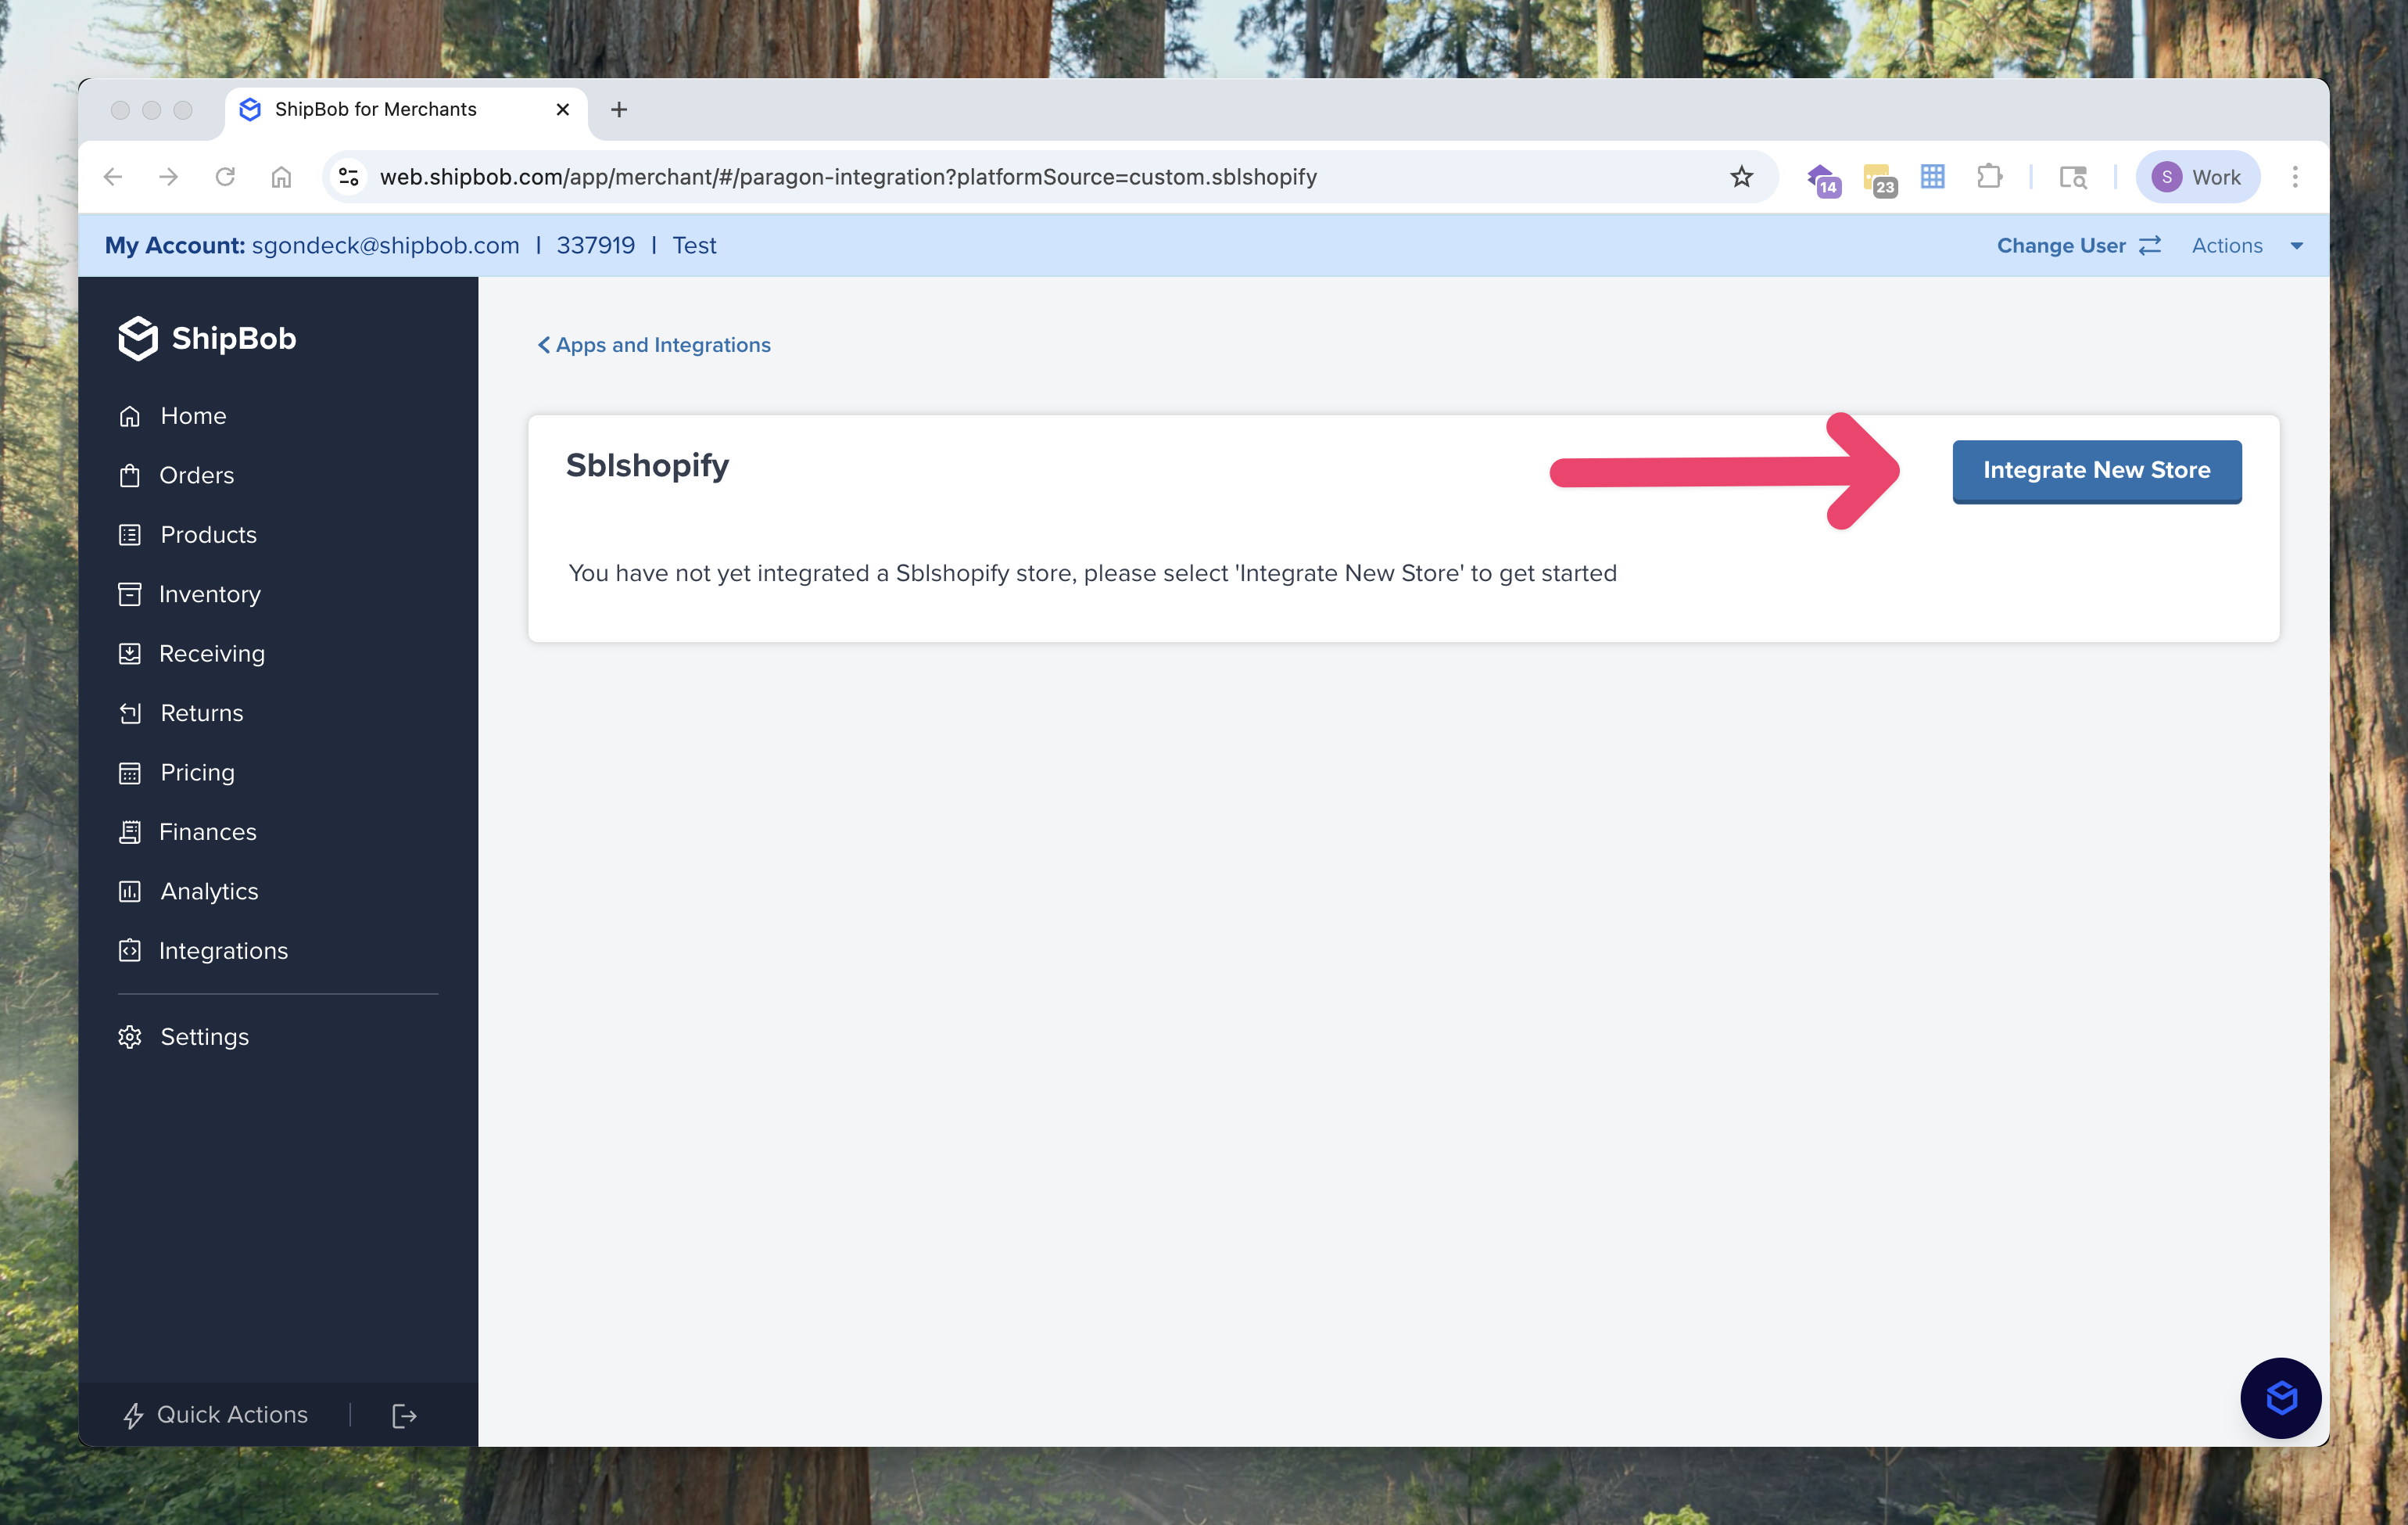
1. Log in to your [ShipBob account](https://web.shipbob.com/Account).
2. Once logged in, go to the Shopify integration page:\
[https://web.shipbob.com/app/merchant/#/paragon-integration?platformSource=custom.sblshopify](https://web.shipbob.com/app/merchant/#/paragon-integration?platformSource=custom.sblshopify)
3. Click **Integrate New Store**.
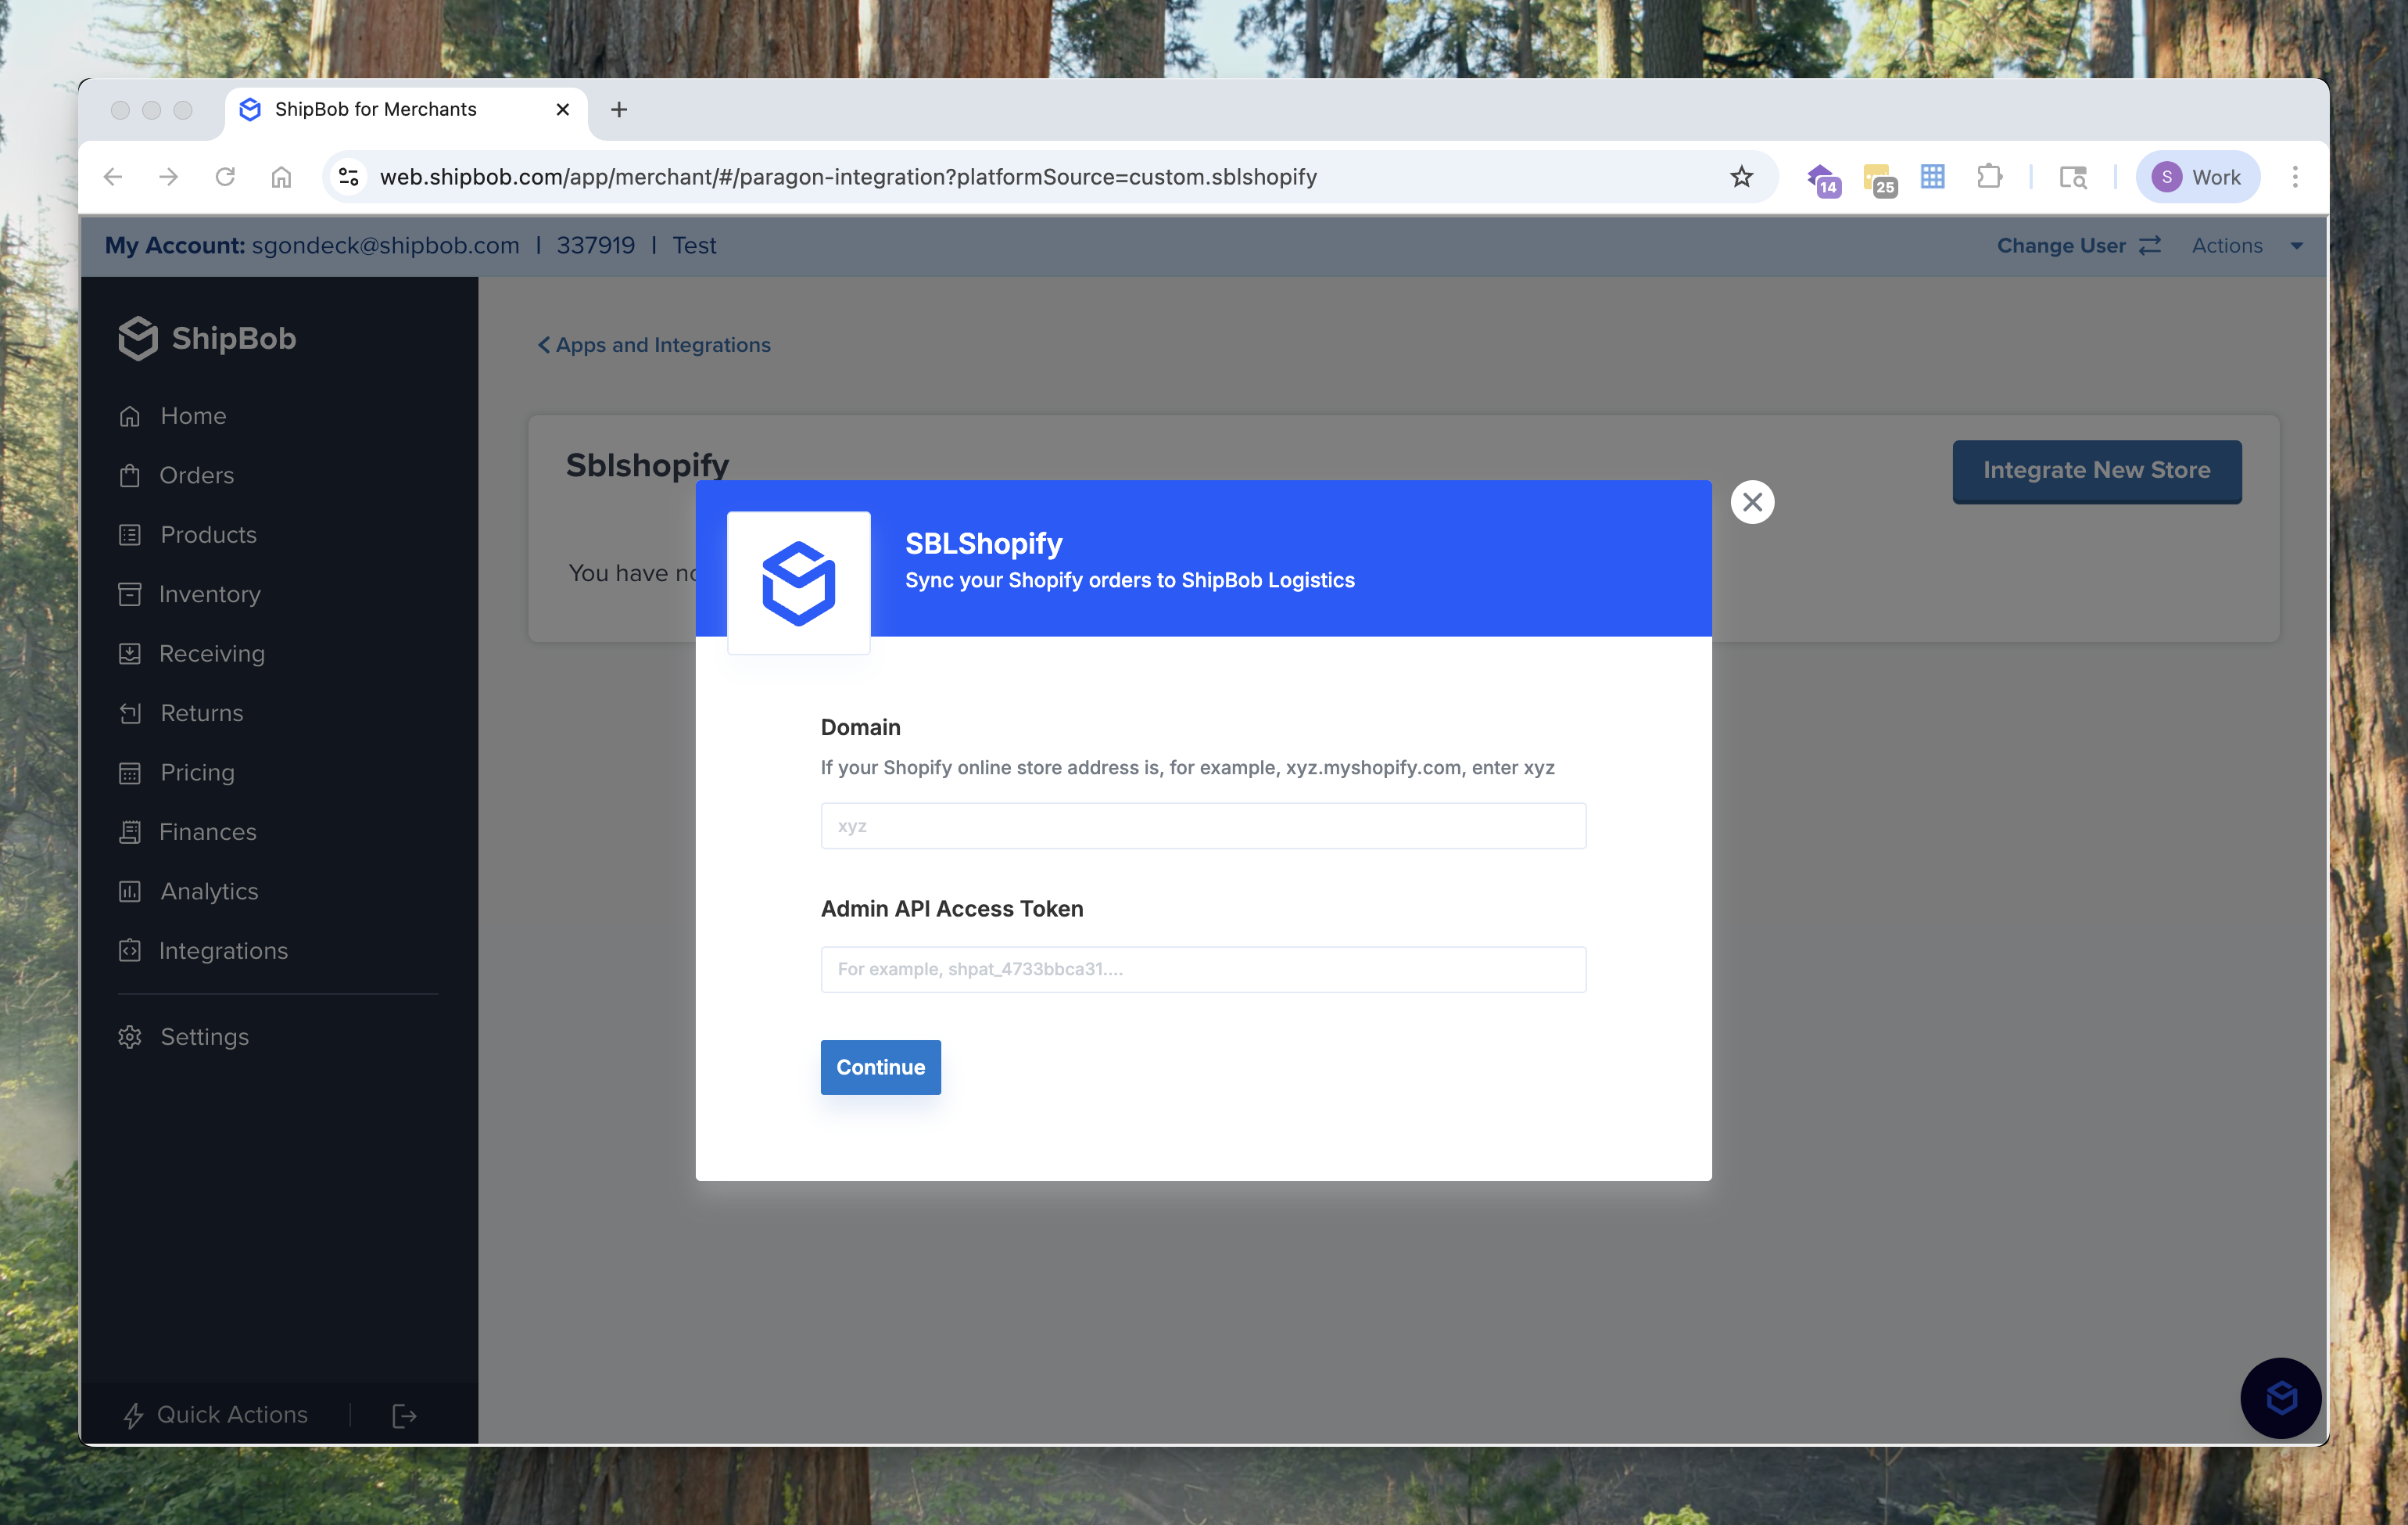
4. Add your **Shopify Store Domain** and **Admin Access Token**.
* **Domain:** Enter your Shopify store name (not the full URL).\
To find it, log in to your Shopify admin and look at the URL in your address bar.\
For example, if your URL is `https://admin.shopify.com/store/shipbob-markets`,\
you would enter **`shipbob-markets`** here.
Example completed form:
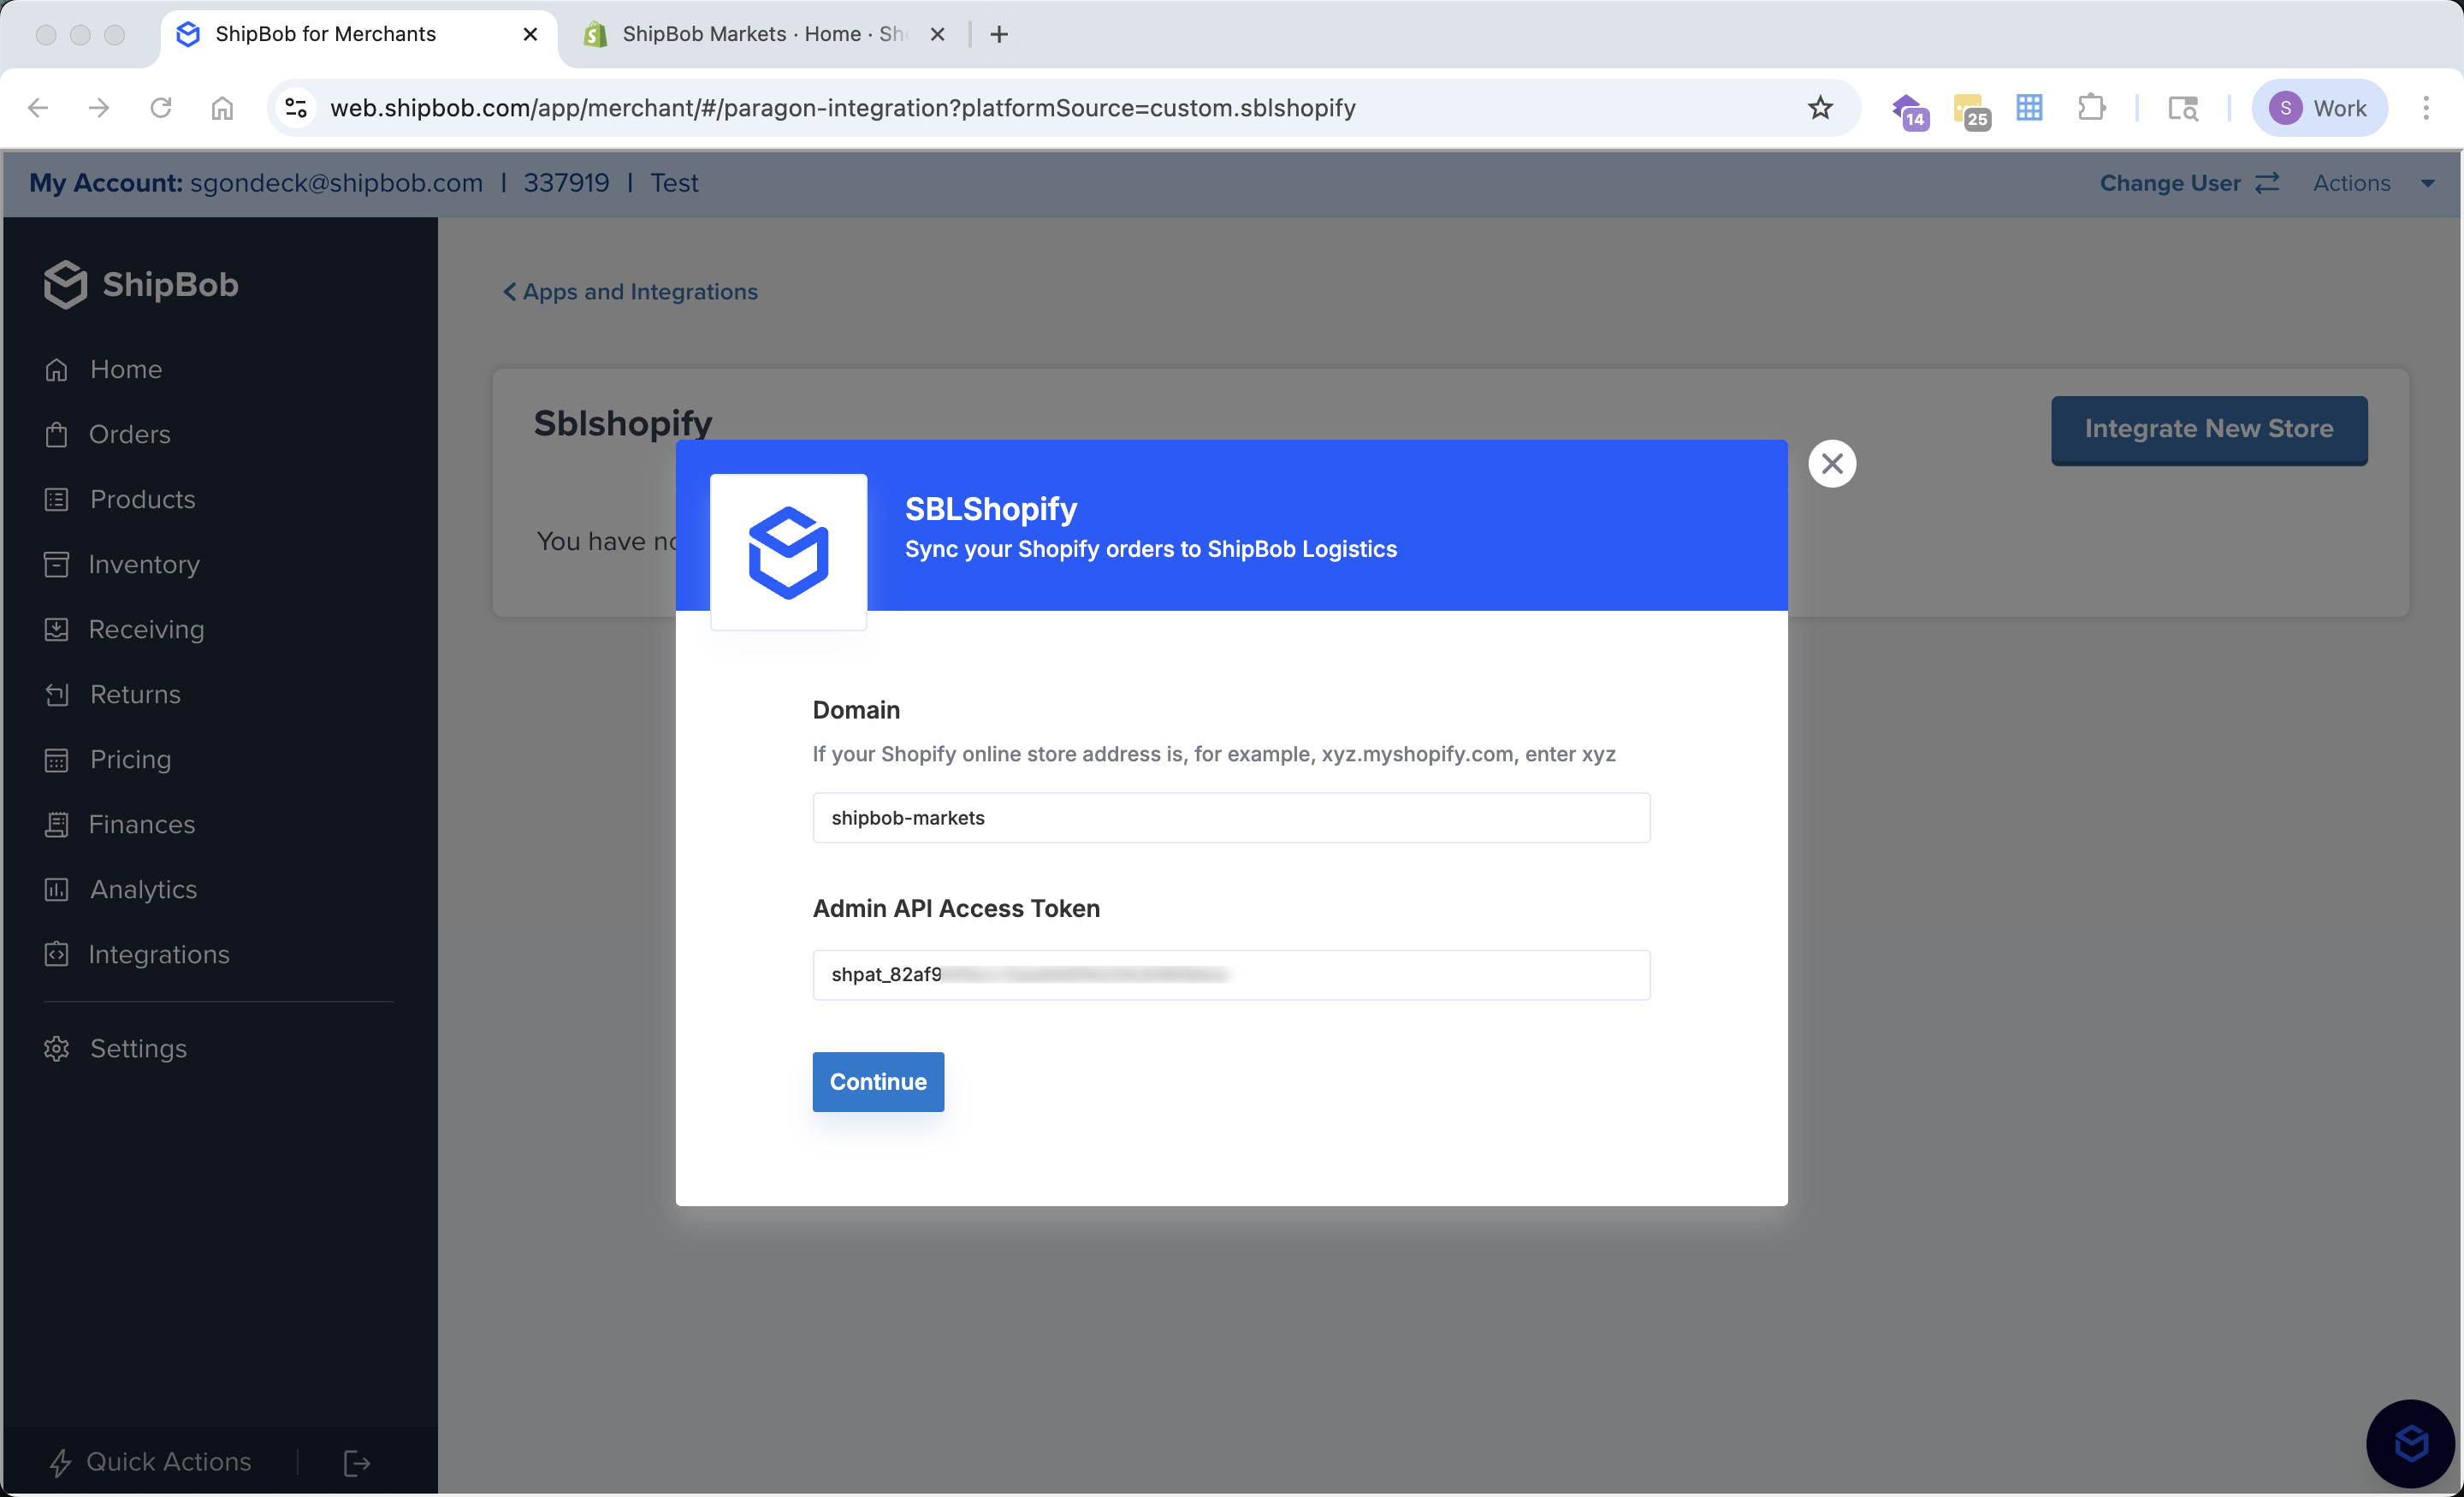
* **Admin Access Token:** See below section for how to do this.
***
## Generate a Shopify Admin API Access Token
To connect your Shopify store, you’ll need to generate an **Admin API Access Token** by creating a custom app within Shopify.
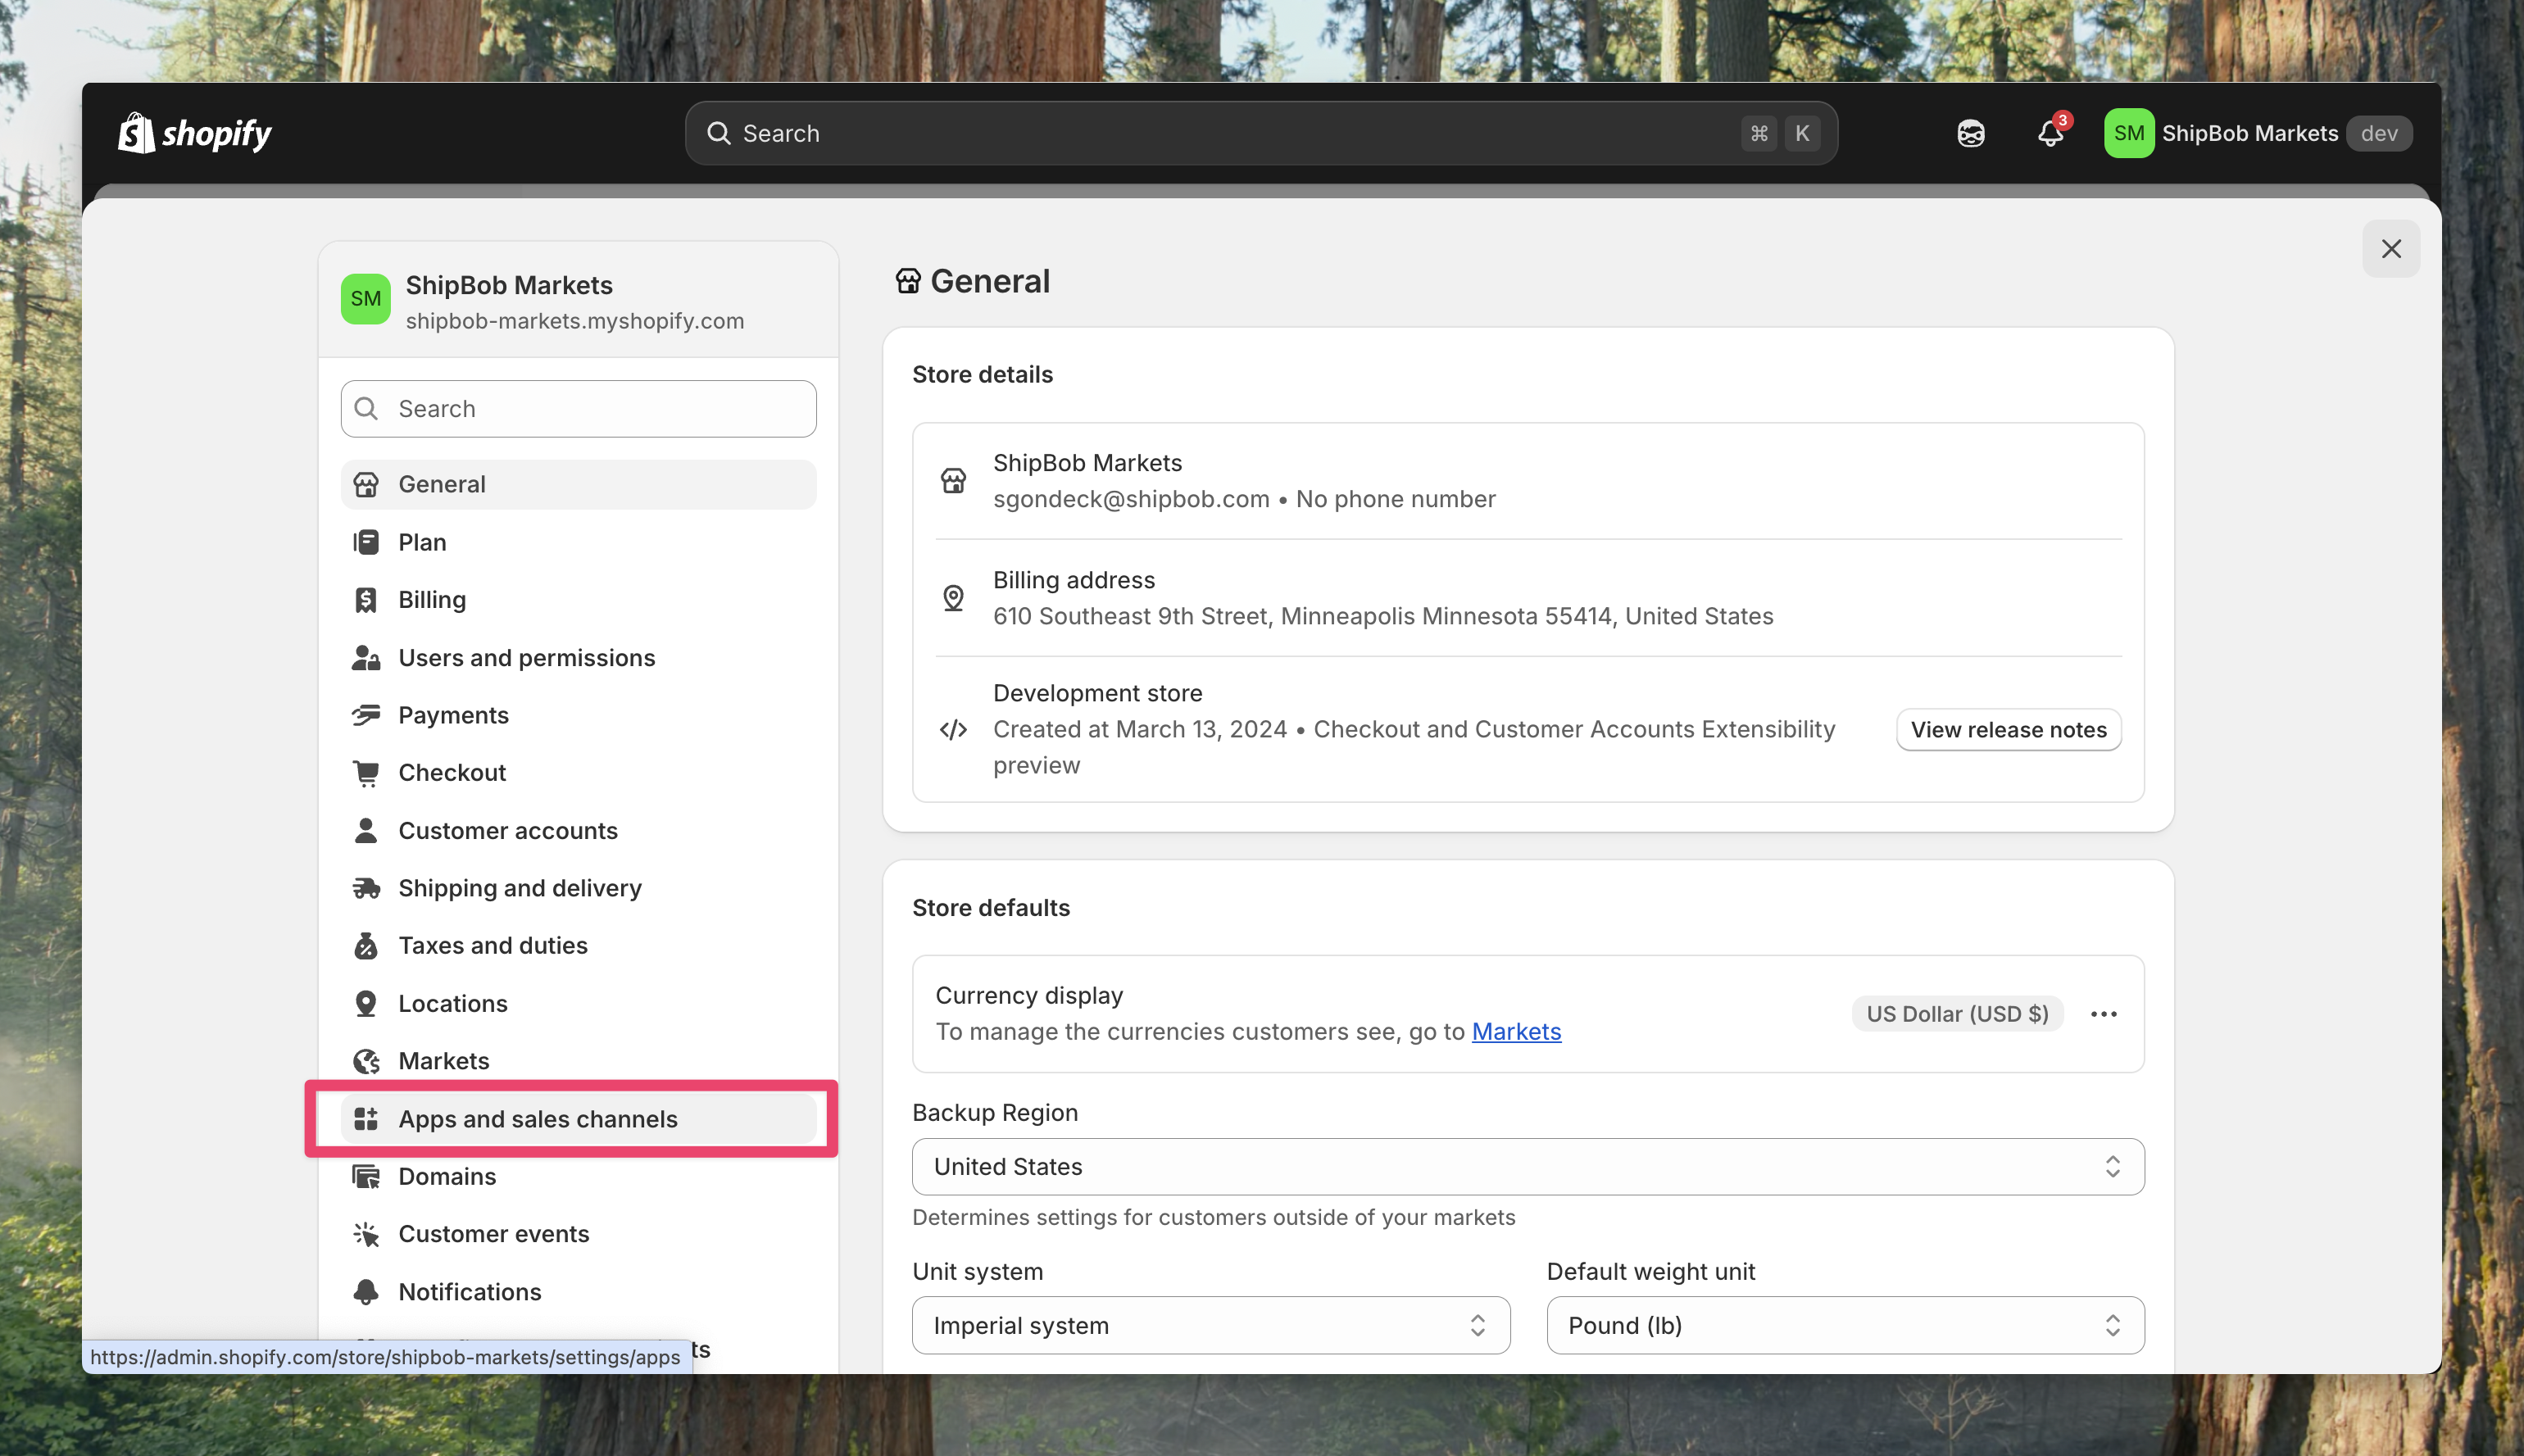
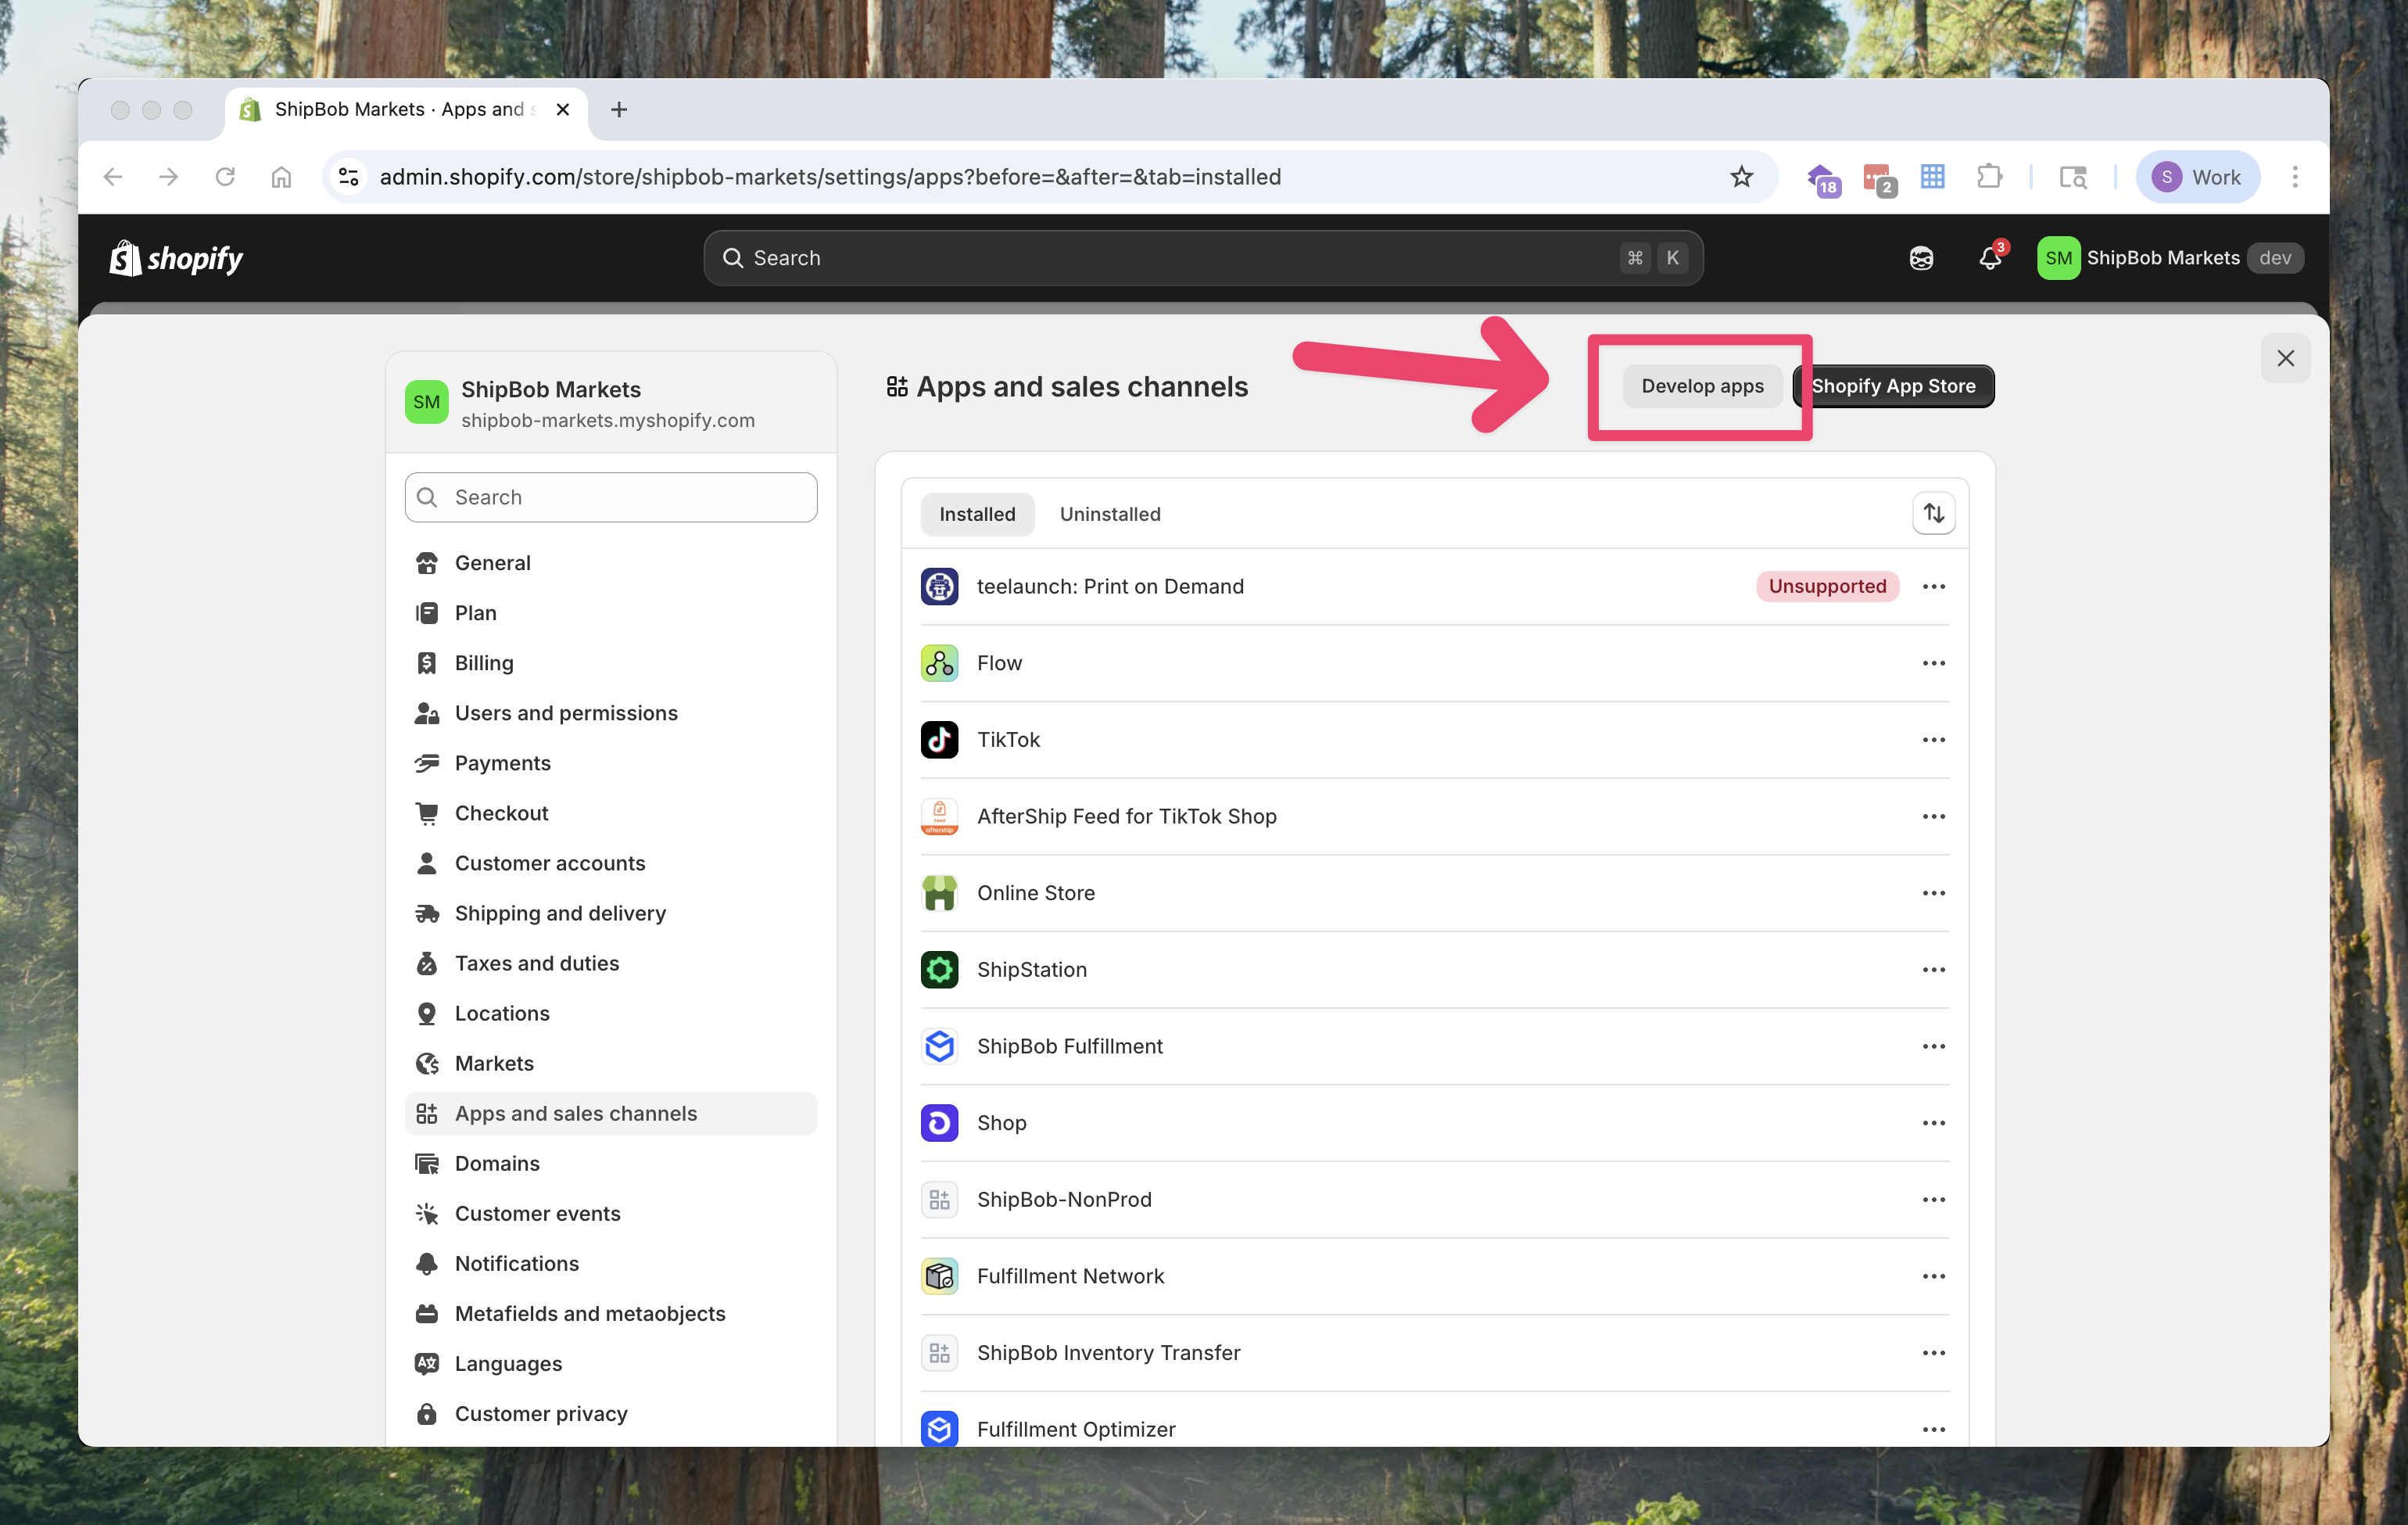
1. In your Shopify admin, go to **Settings → Apps and sales channels**.
2. Click **Develop apps**.
3. Click **Create an app**.
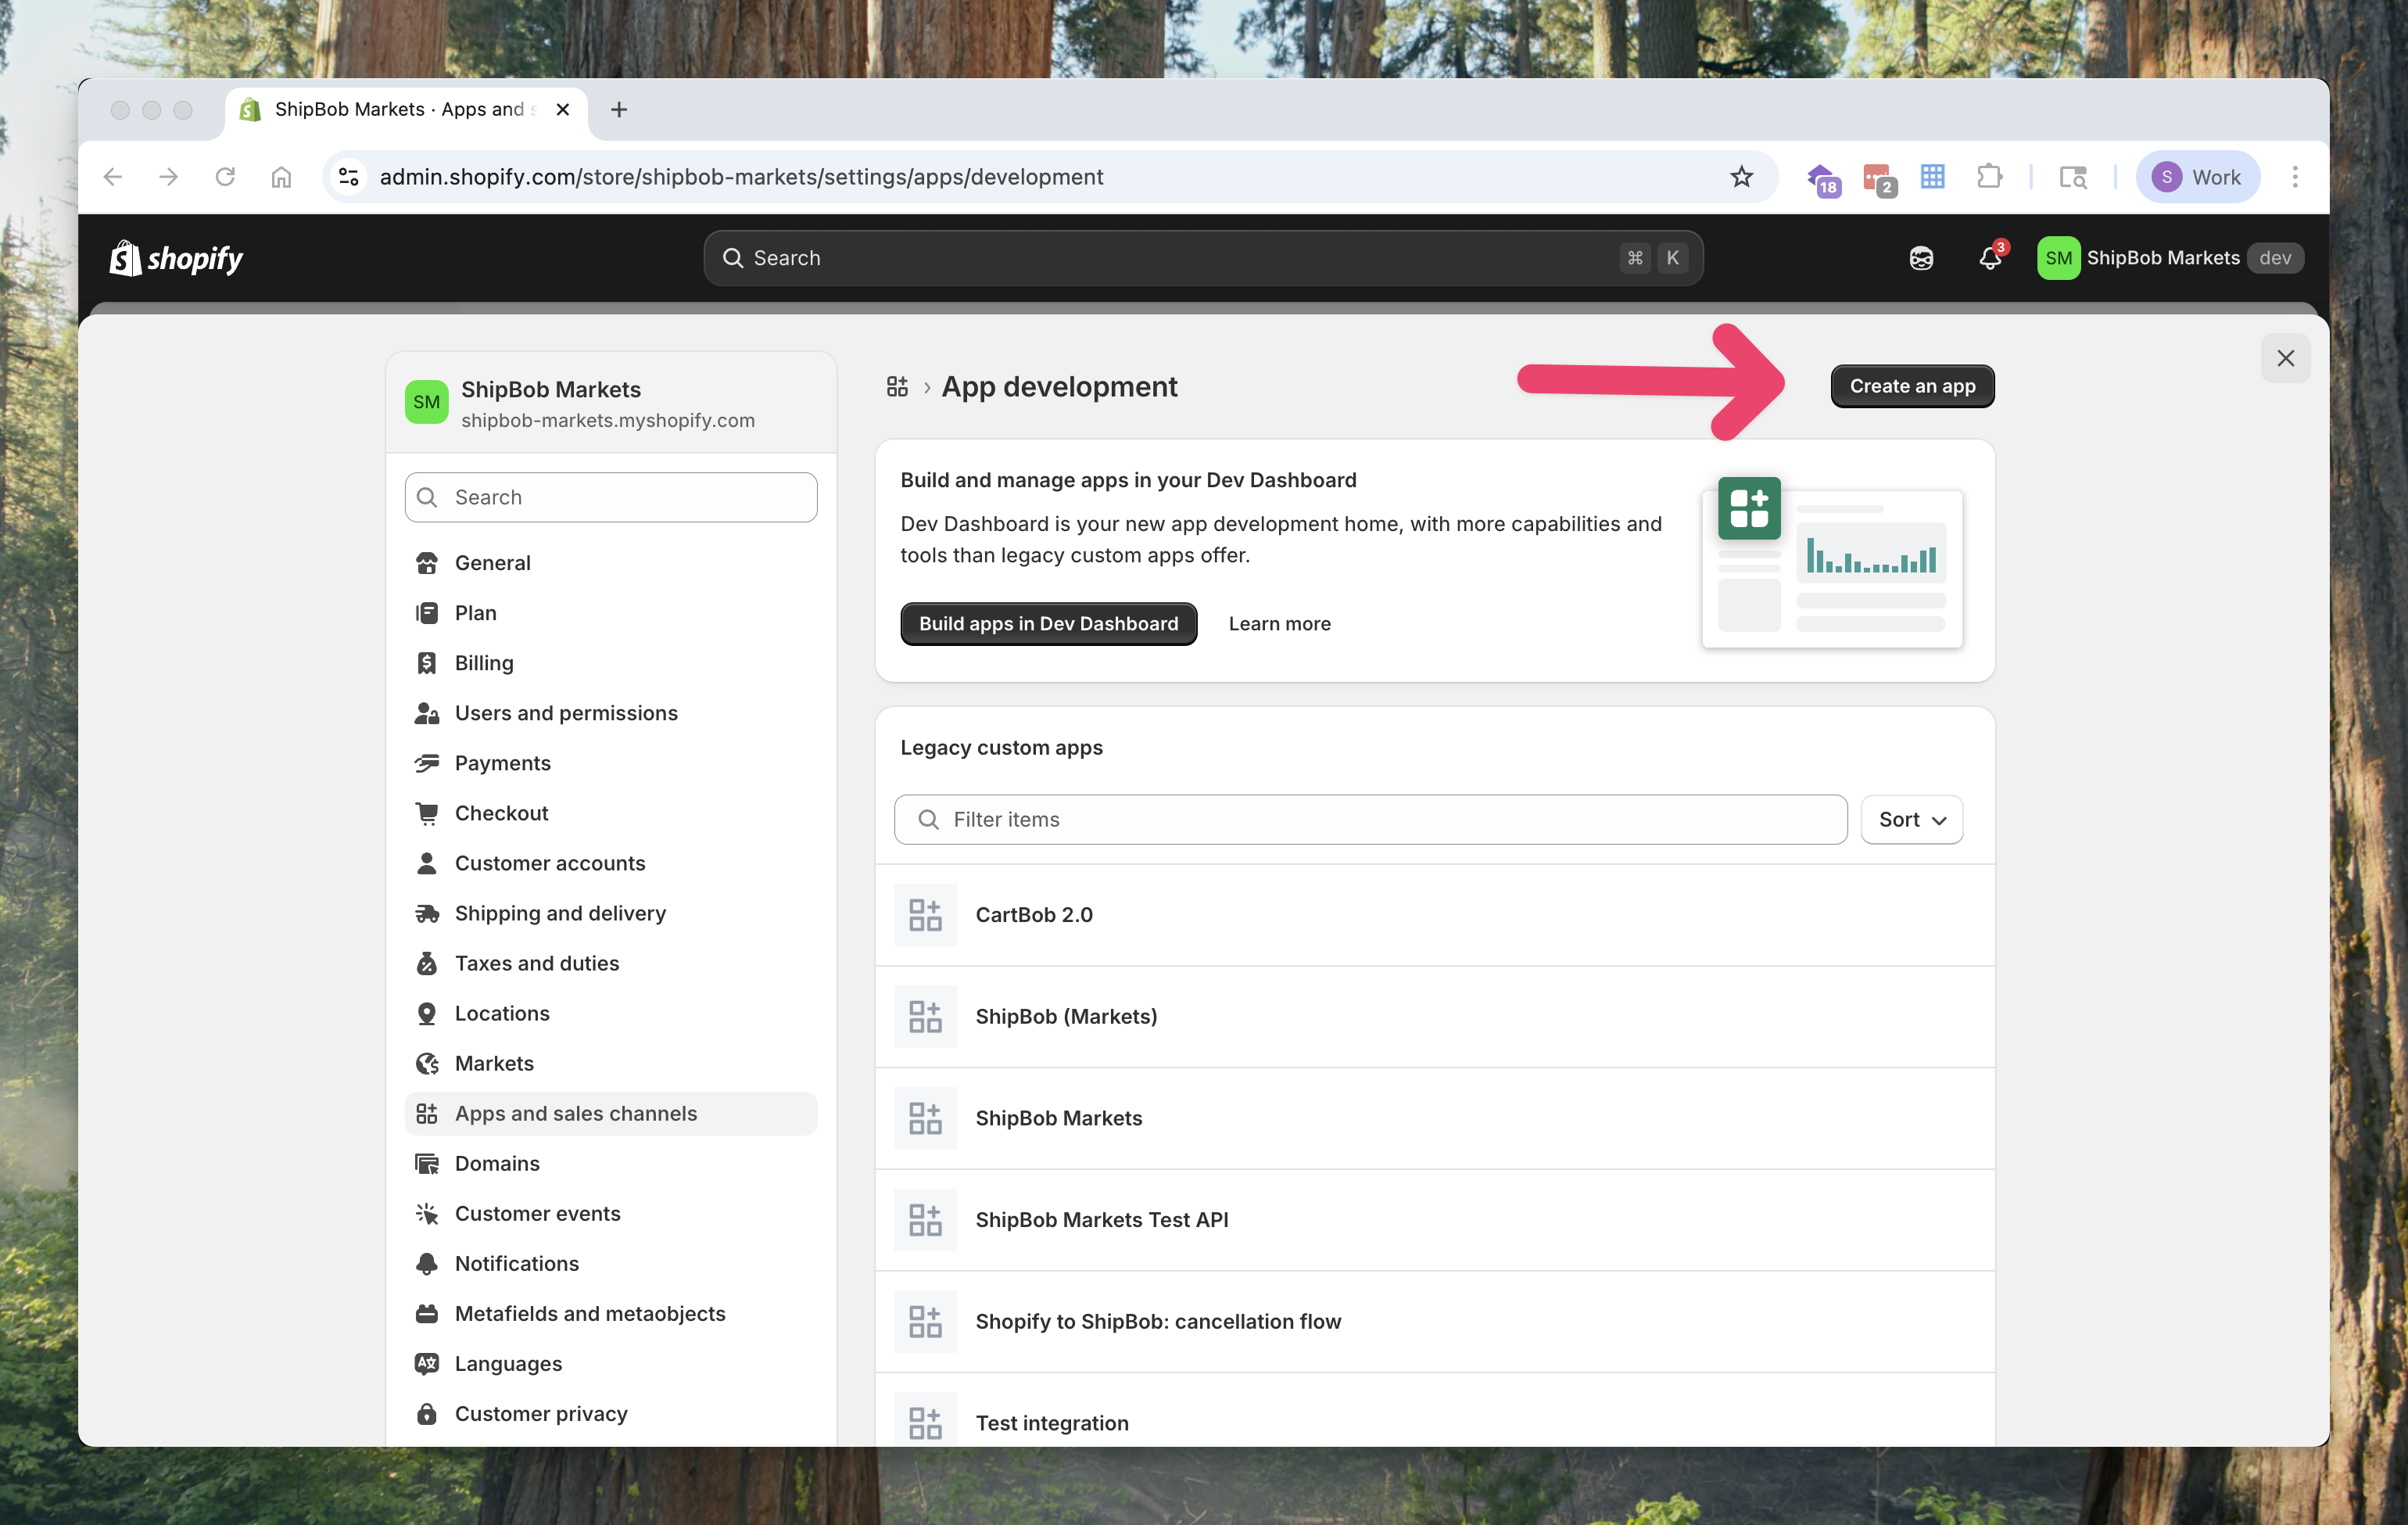
4. Enter the **App name** as `ShipBob Logistics`, then click **Create app**.
### Configure Admin API Permissions
5. After the app is created, open the **Configuration** tab.
6. Under **Admin API integration**, click **Configure**.
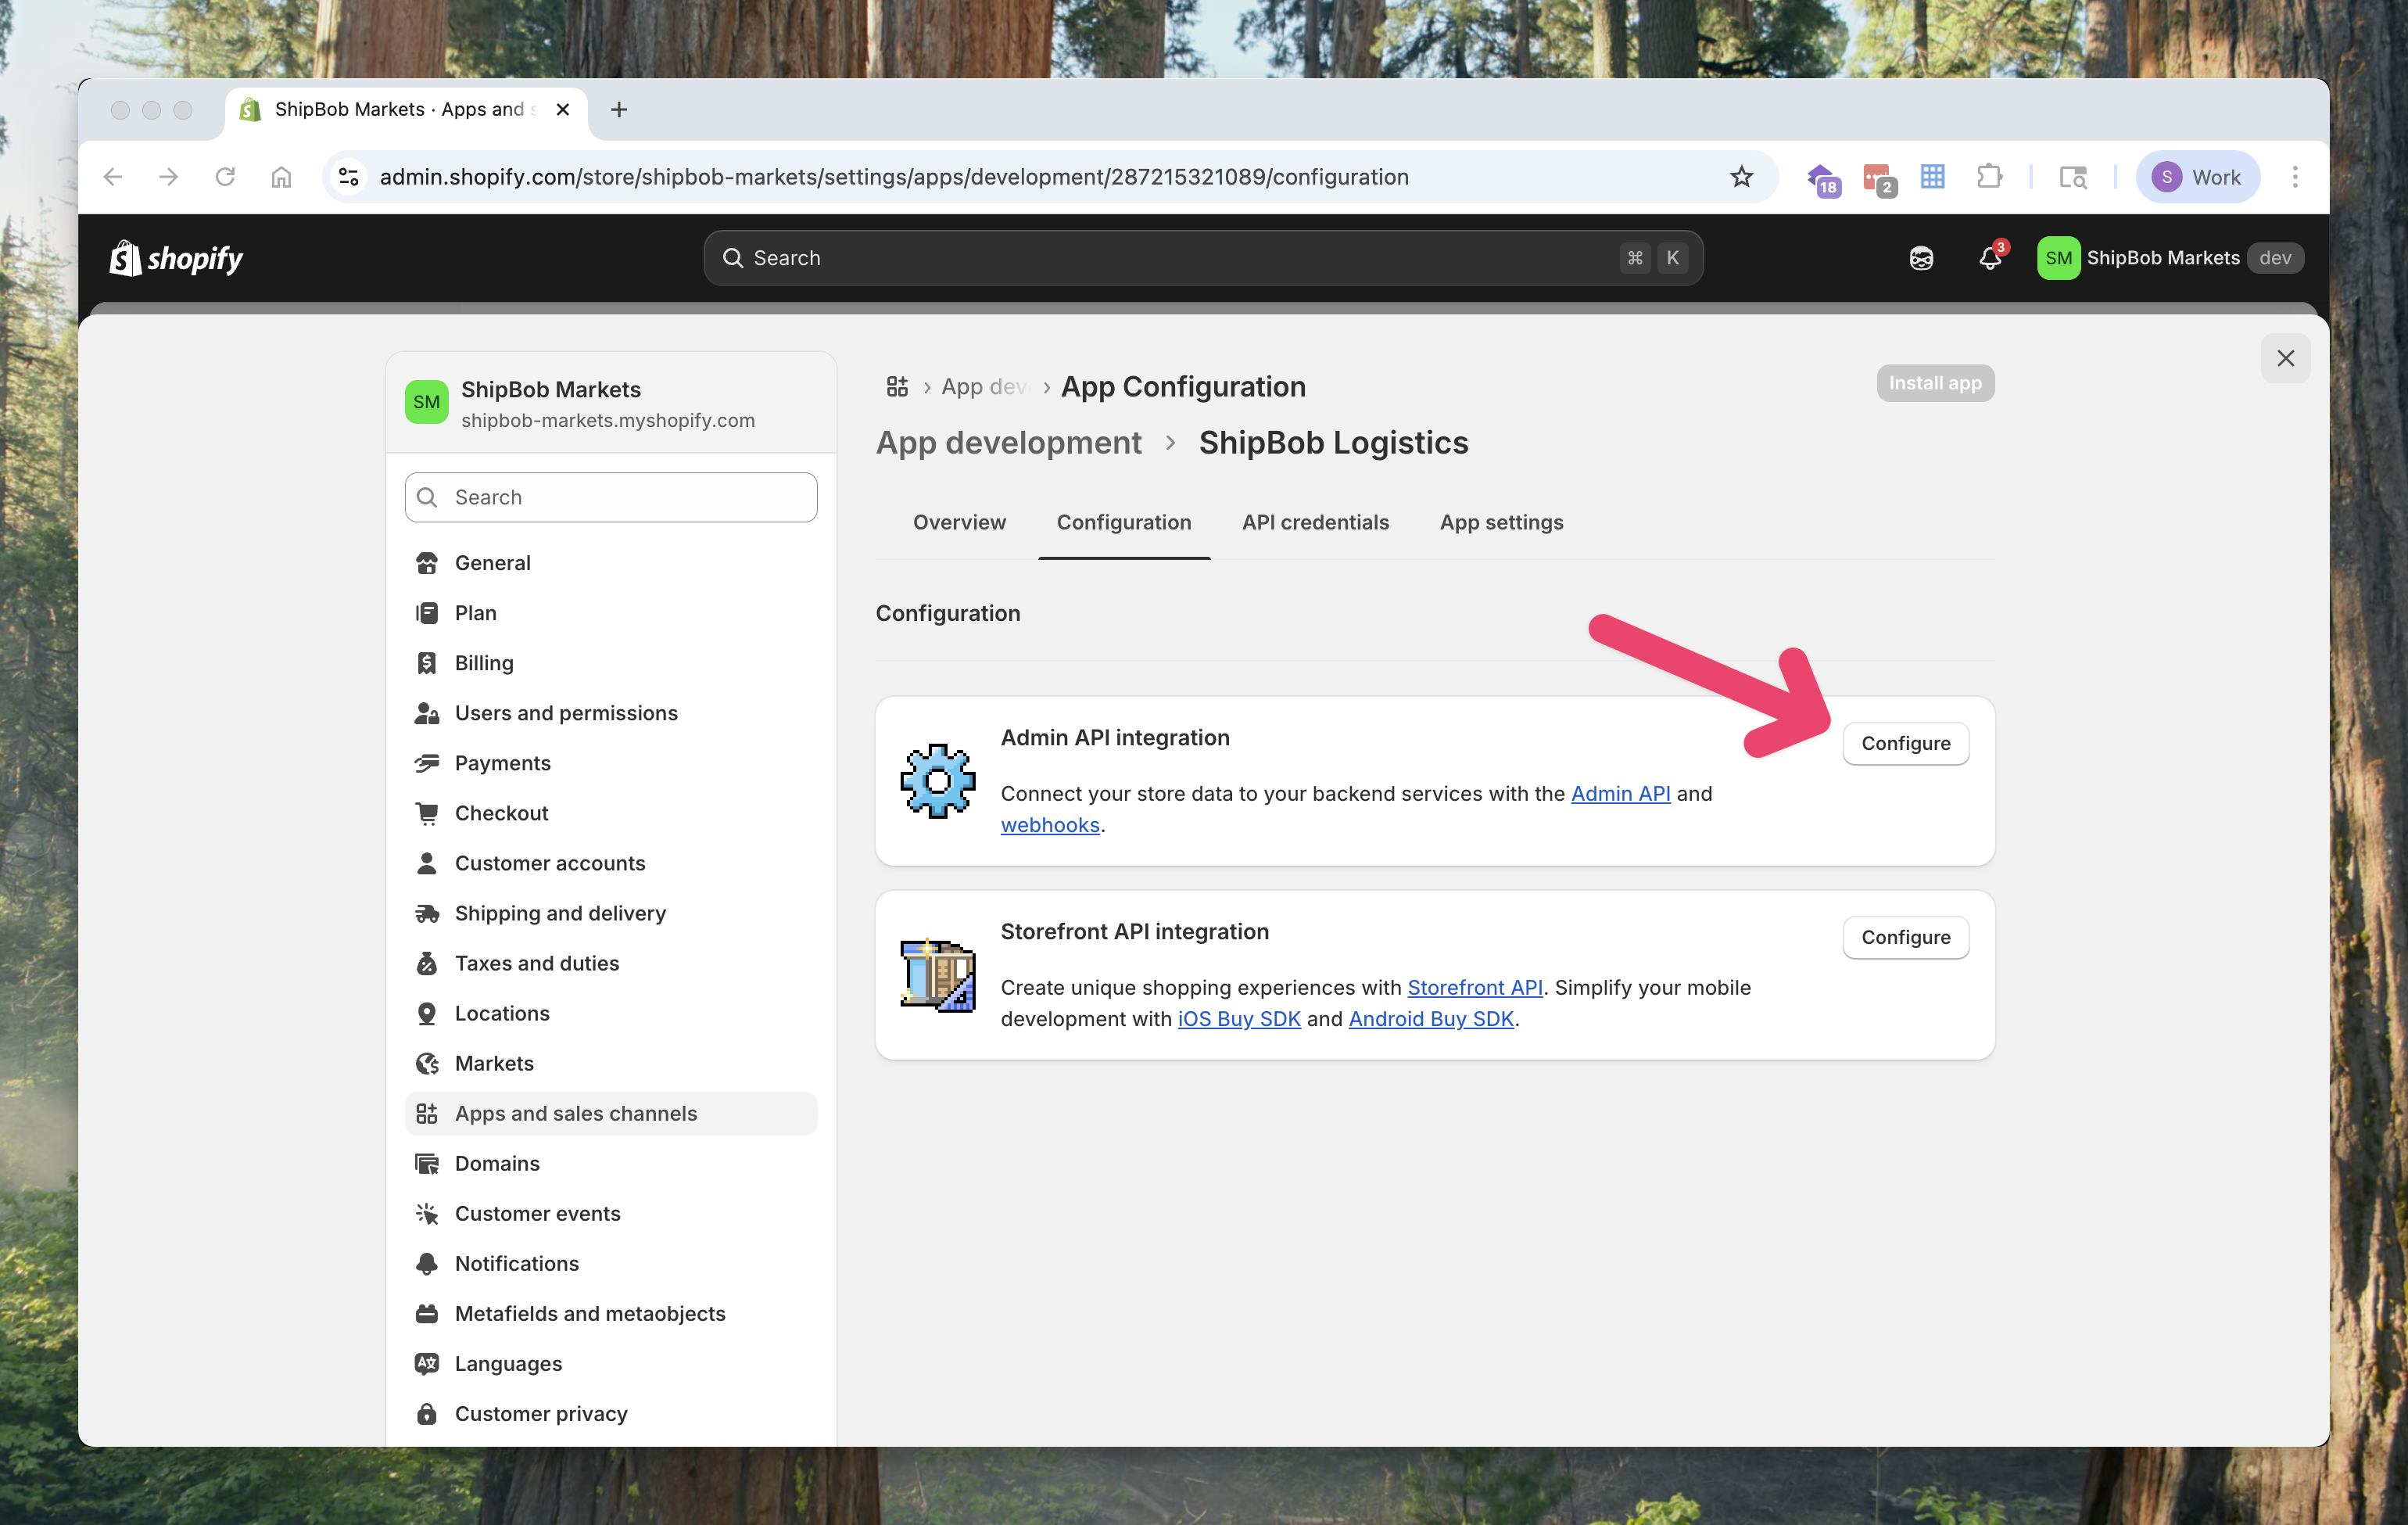
7. Select **All Scopes** (or at minimum, ensure `Orders`, `Inventory`, `Locations`, and `Fulfillment` permissions are enabled).
8. Click **Save**.
### Generate the Access Token
9. Go to the **API credentials** tab.
10. Click **Install app** → **Install**.
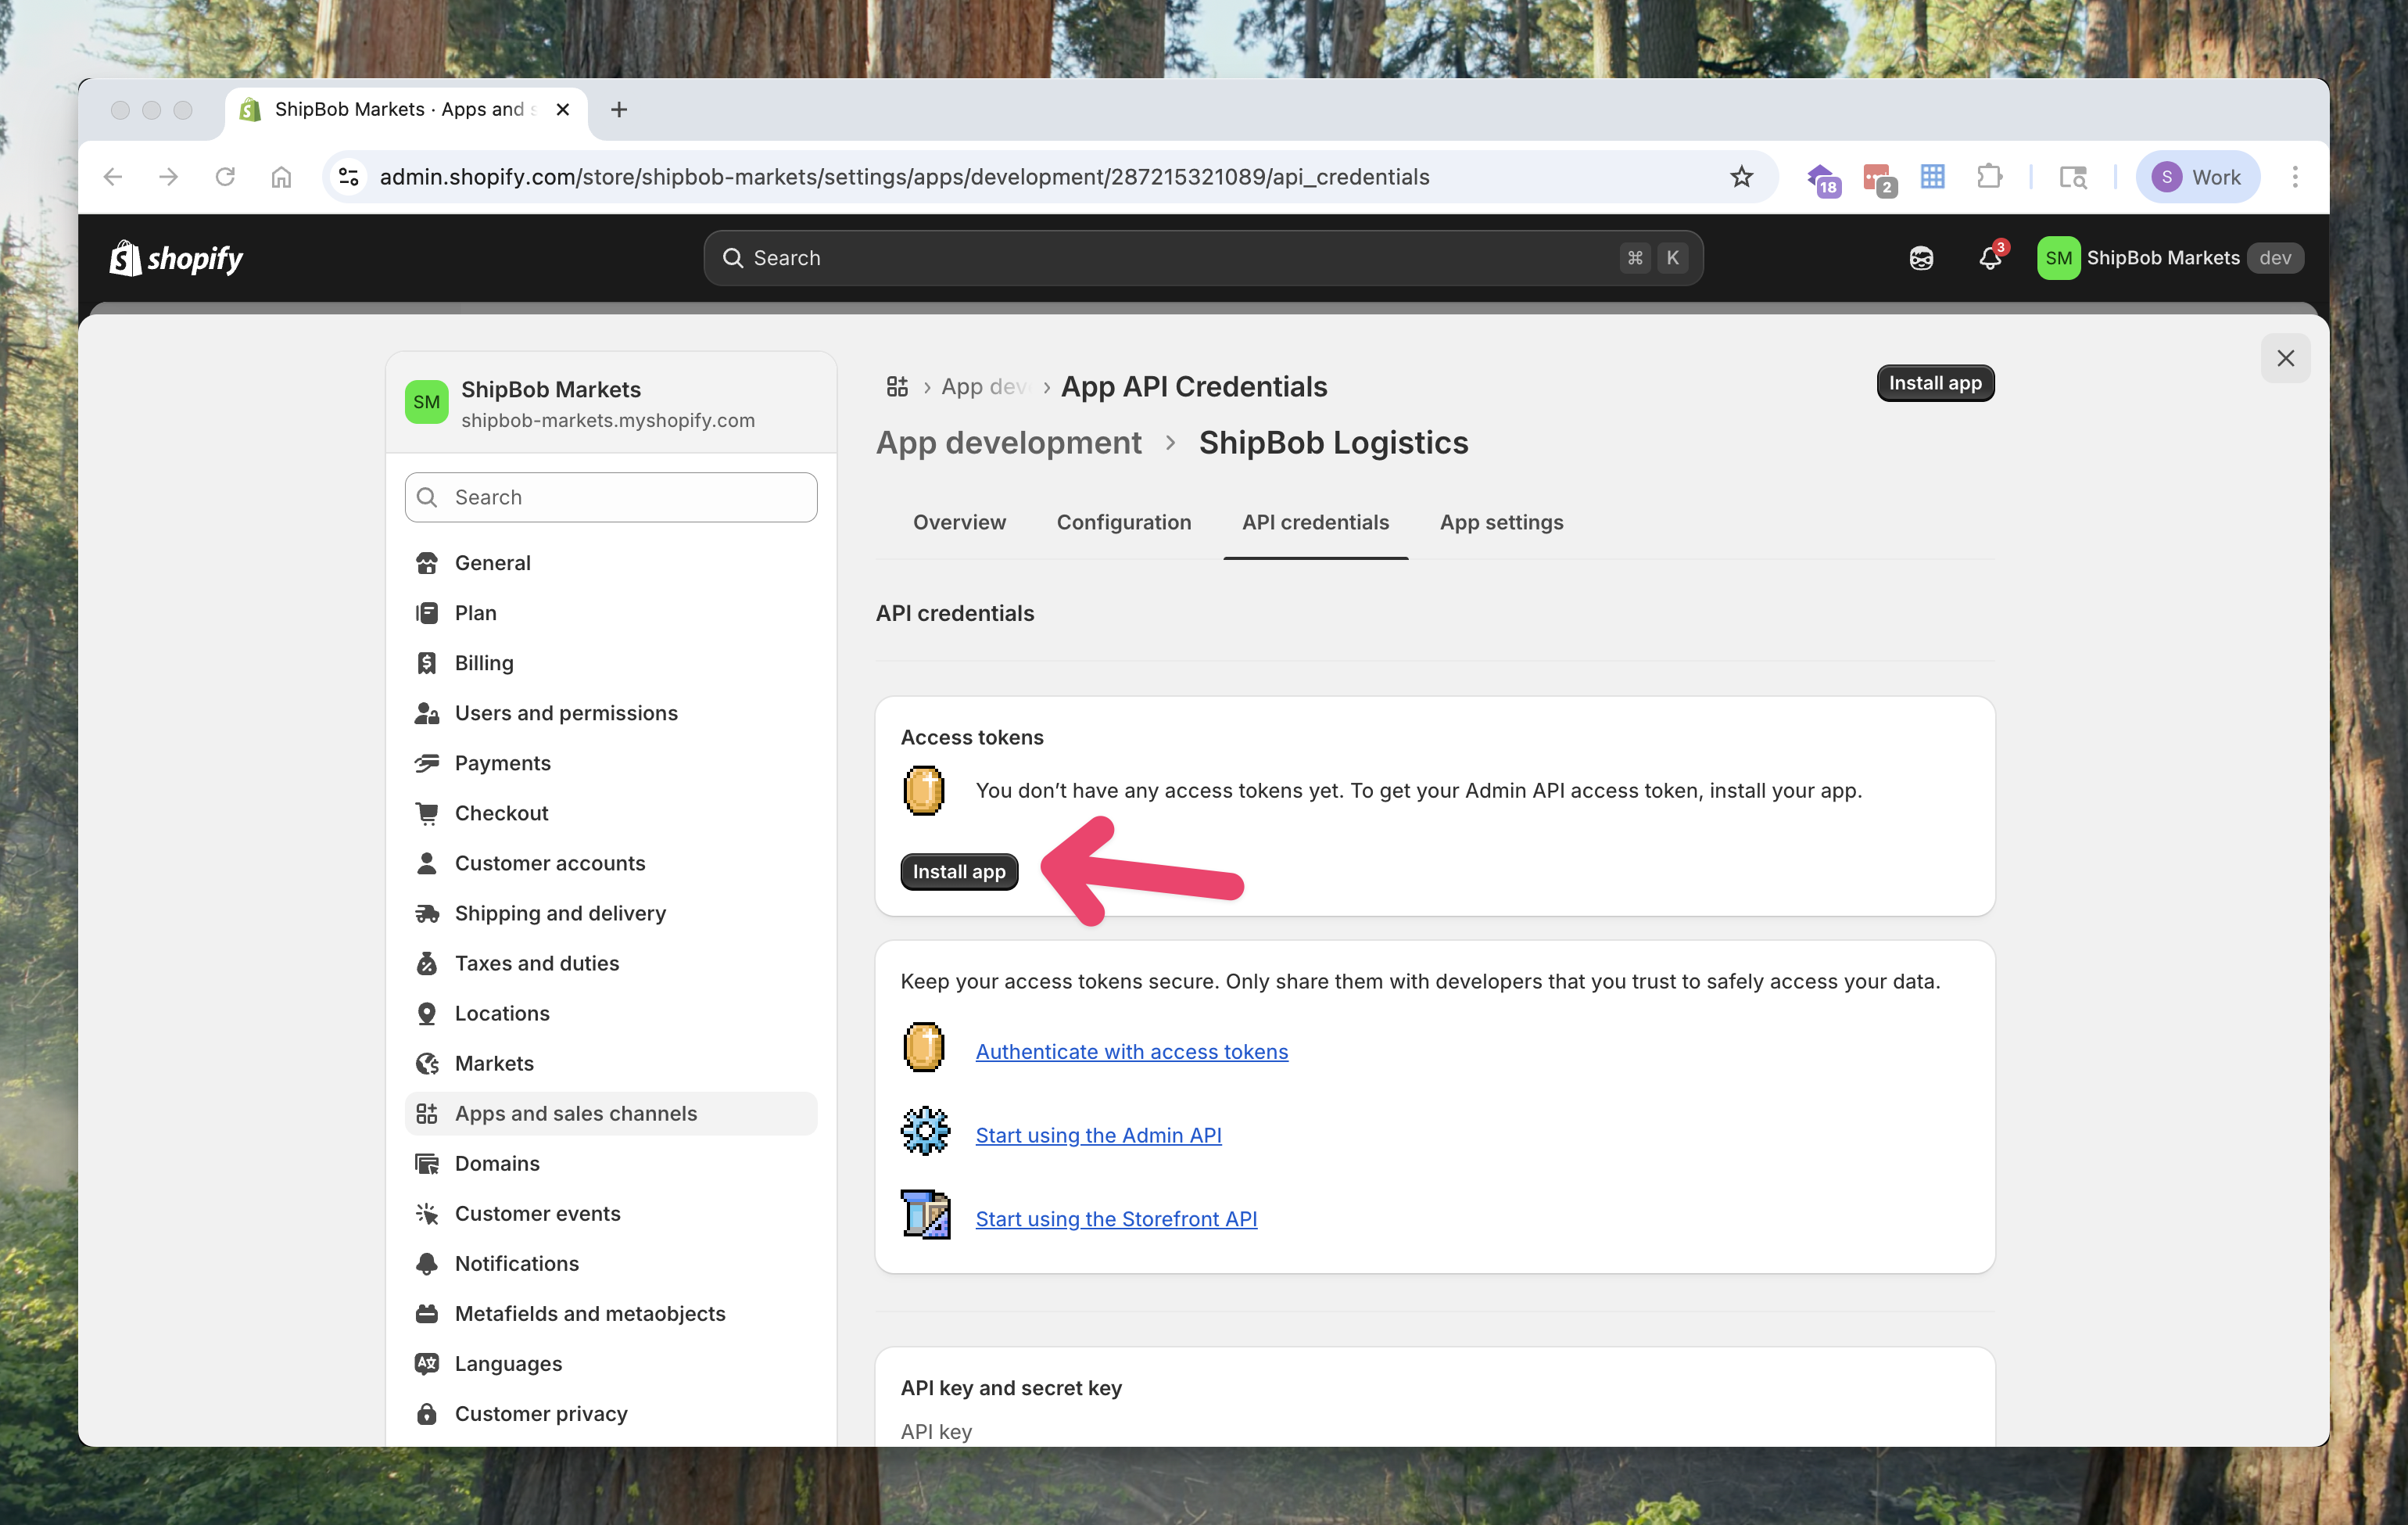
11. Once installed, click **Reveal token once** to view your Admin Access Token.
12. Copy the token — it will start with `shpat_`.
> ⚠️ **Important:** You can only reveal this token once.\
> Save it securely, as you’ll need it later to connect Shopify with ShipBob.
13. Return to the ShipBob integration setup page and paste the **Admin Access Token** in the required fields.
14. Click **Manage** to configure integration settings.
***
## Configure Integration Settings
Fill in the integration fields as follows:
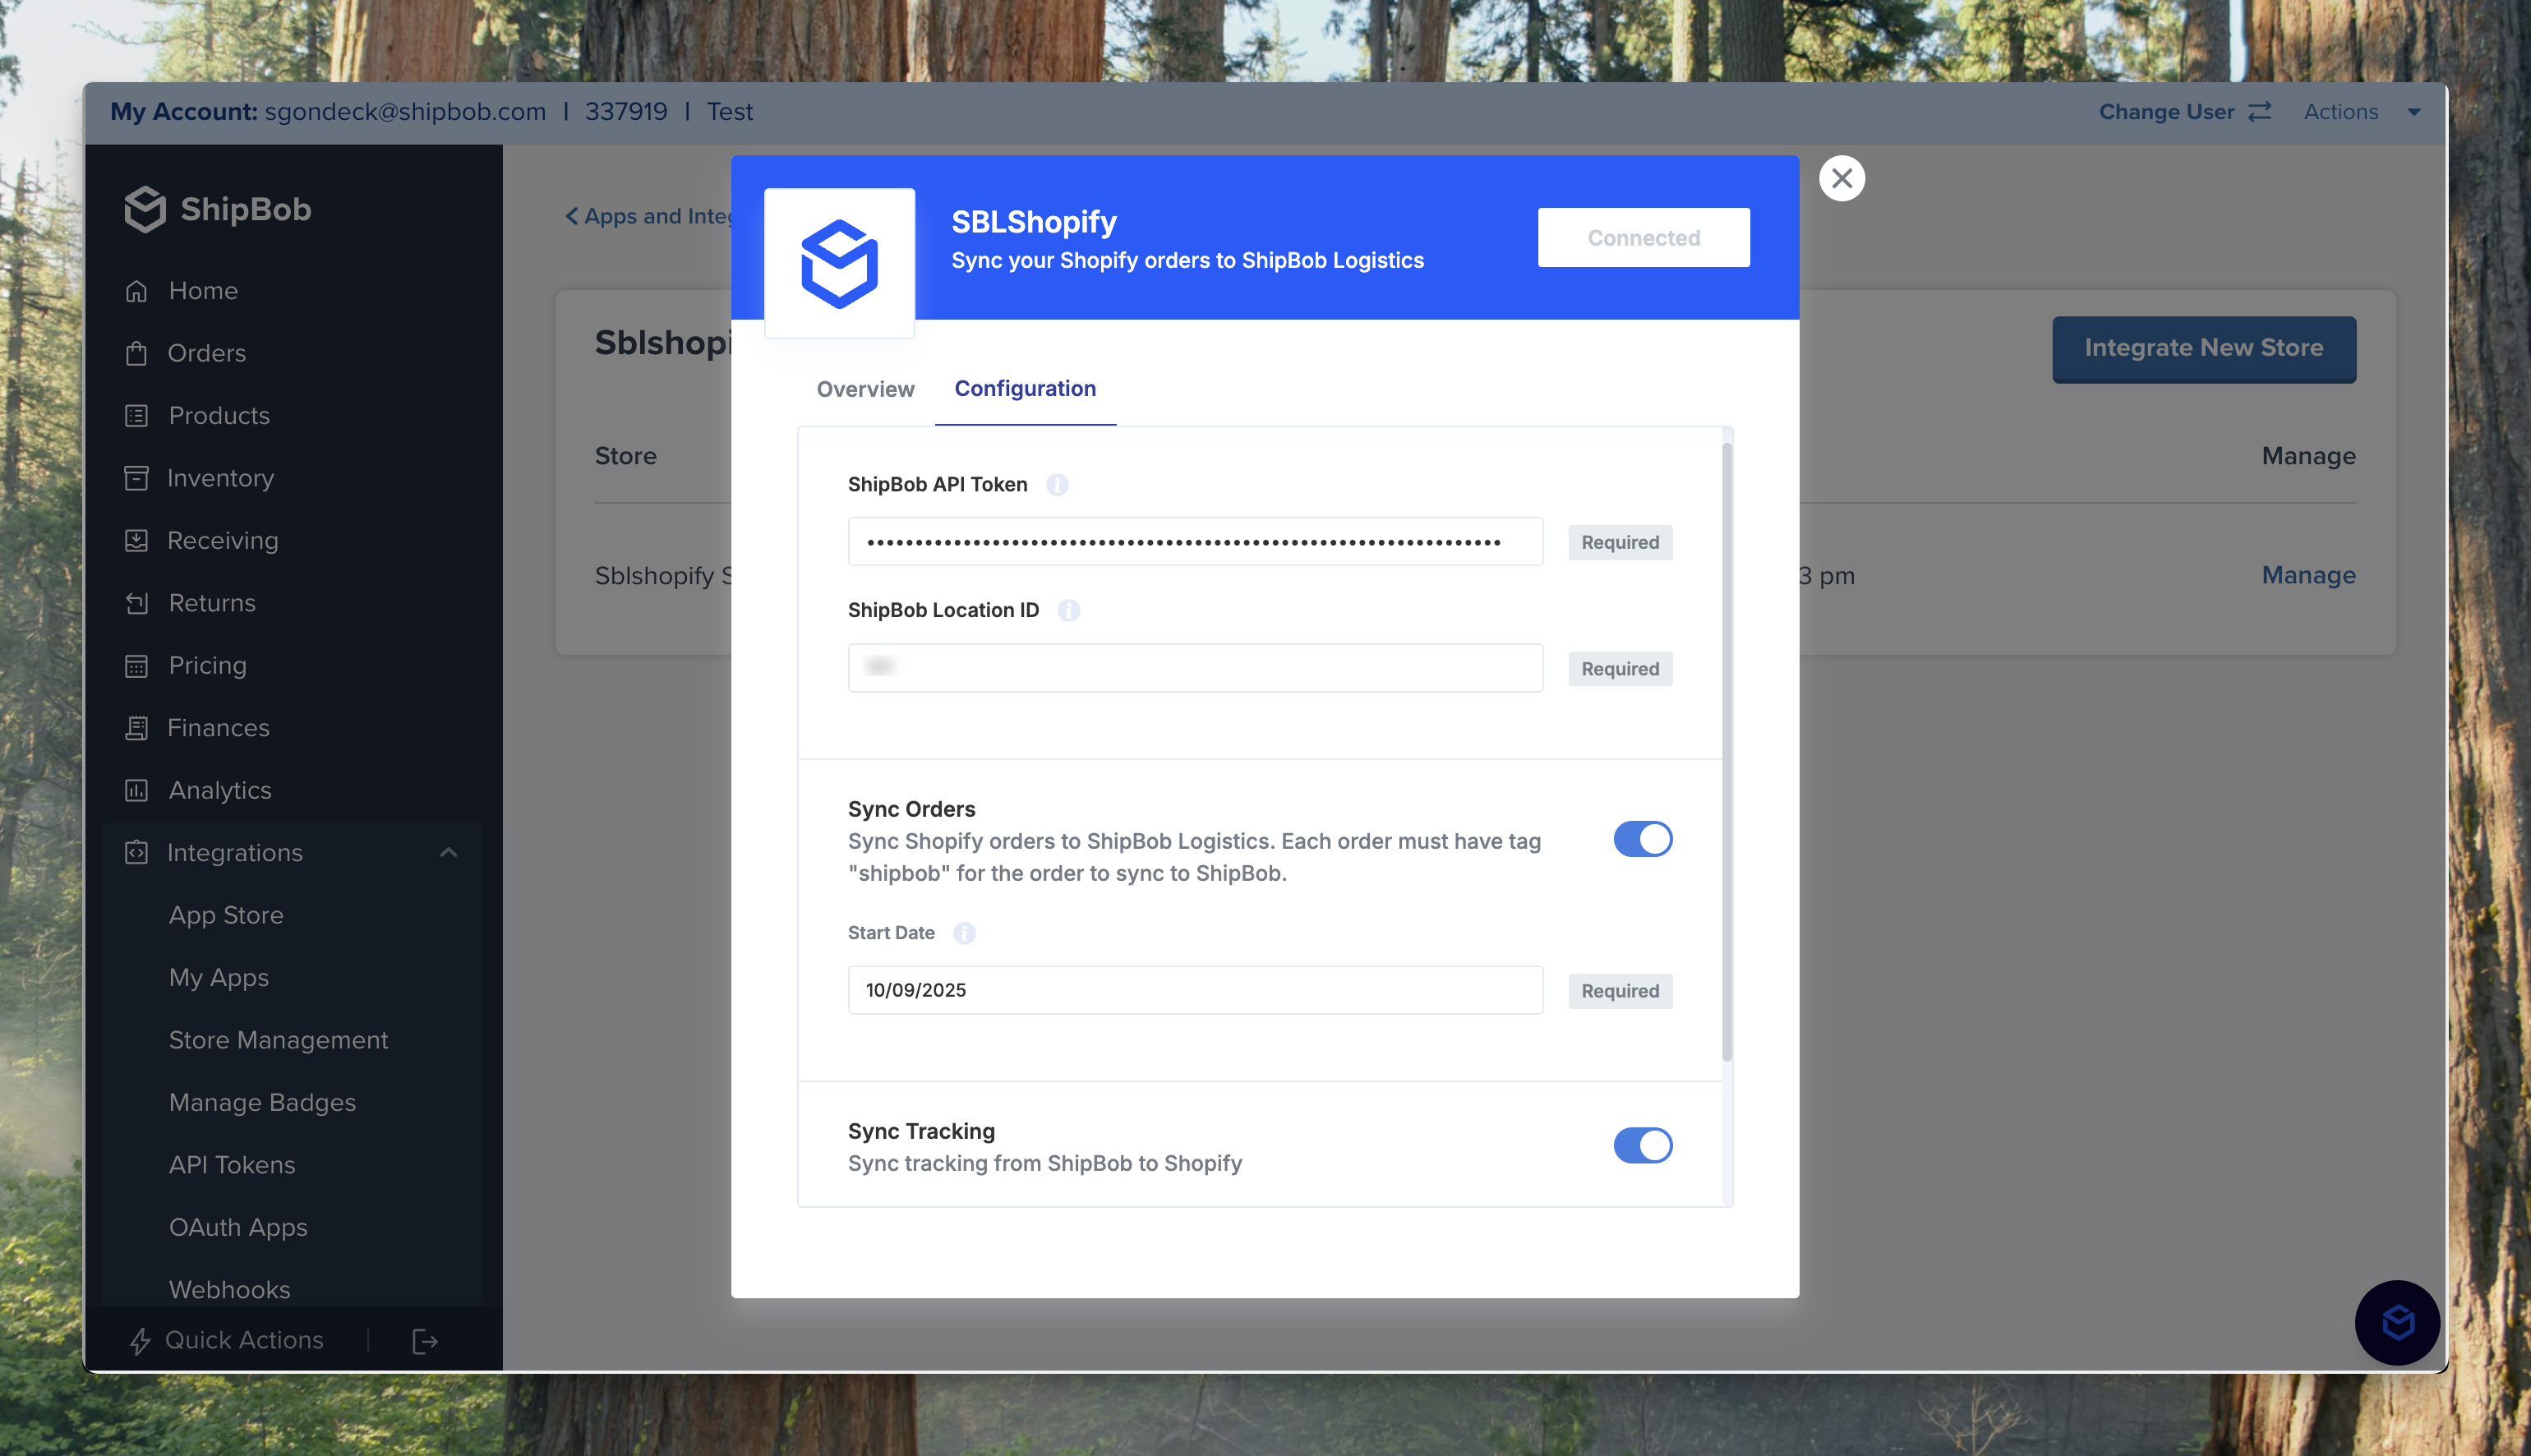
### Connection Details
* **ShipBob API Token**\
Copy/paste your ShipBob API Token. Obtain this from your ShipBob Implementation Manager.
* **ShipBob Location ID**\
Enter your ShipBob Location ID. Your Implementation Manager can provide this.
### Shopify Sync Settings
Enable workflows to automate syncing between Shopify and ShipBob.
* **Sync Orders**\
Sync Shopify orders to ShipBob Logistics. Each order must include the tag `"ShipBob"` to sync.
* **Start Date:** Enter a start date in `MM/DD/YYYY` format (e.g. `10/01/2025`).
* Orders sync automatically every 15 minutes.
You can bulk edit multiple orders in Shopify to add the
`"ShipBob"`
tag.
* **Sync Tracking**\
After a shipping label is created in ShipBob, tracking details automatically sync back to Shopify and create a fulfillment record.\
Tracking typically appears within seconds of label creation.
***
## Testing
1. In Shopify, create a test order and mark it as **Paid**.
2. Add the tag `"ShipBob"` to the order.
3. Confirm that the order appears in your ShipBob Dashboard under **Orders → All Orders**.
***
## FAQ
Here are some troubleshooting tips:
1. Ensure each order includes the `"ShipBob"` tag.
2. Verify the order has complete address details (address1, city, state, country, etc.).
* **Order sync** runs every 15 minutes.
* **Tracking sync** runs immediately after a label is created.
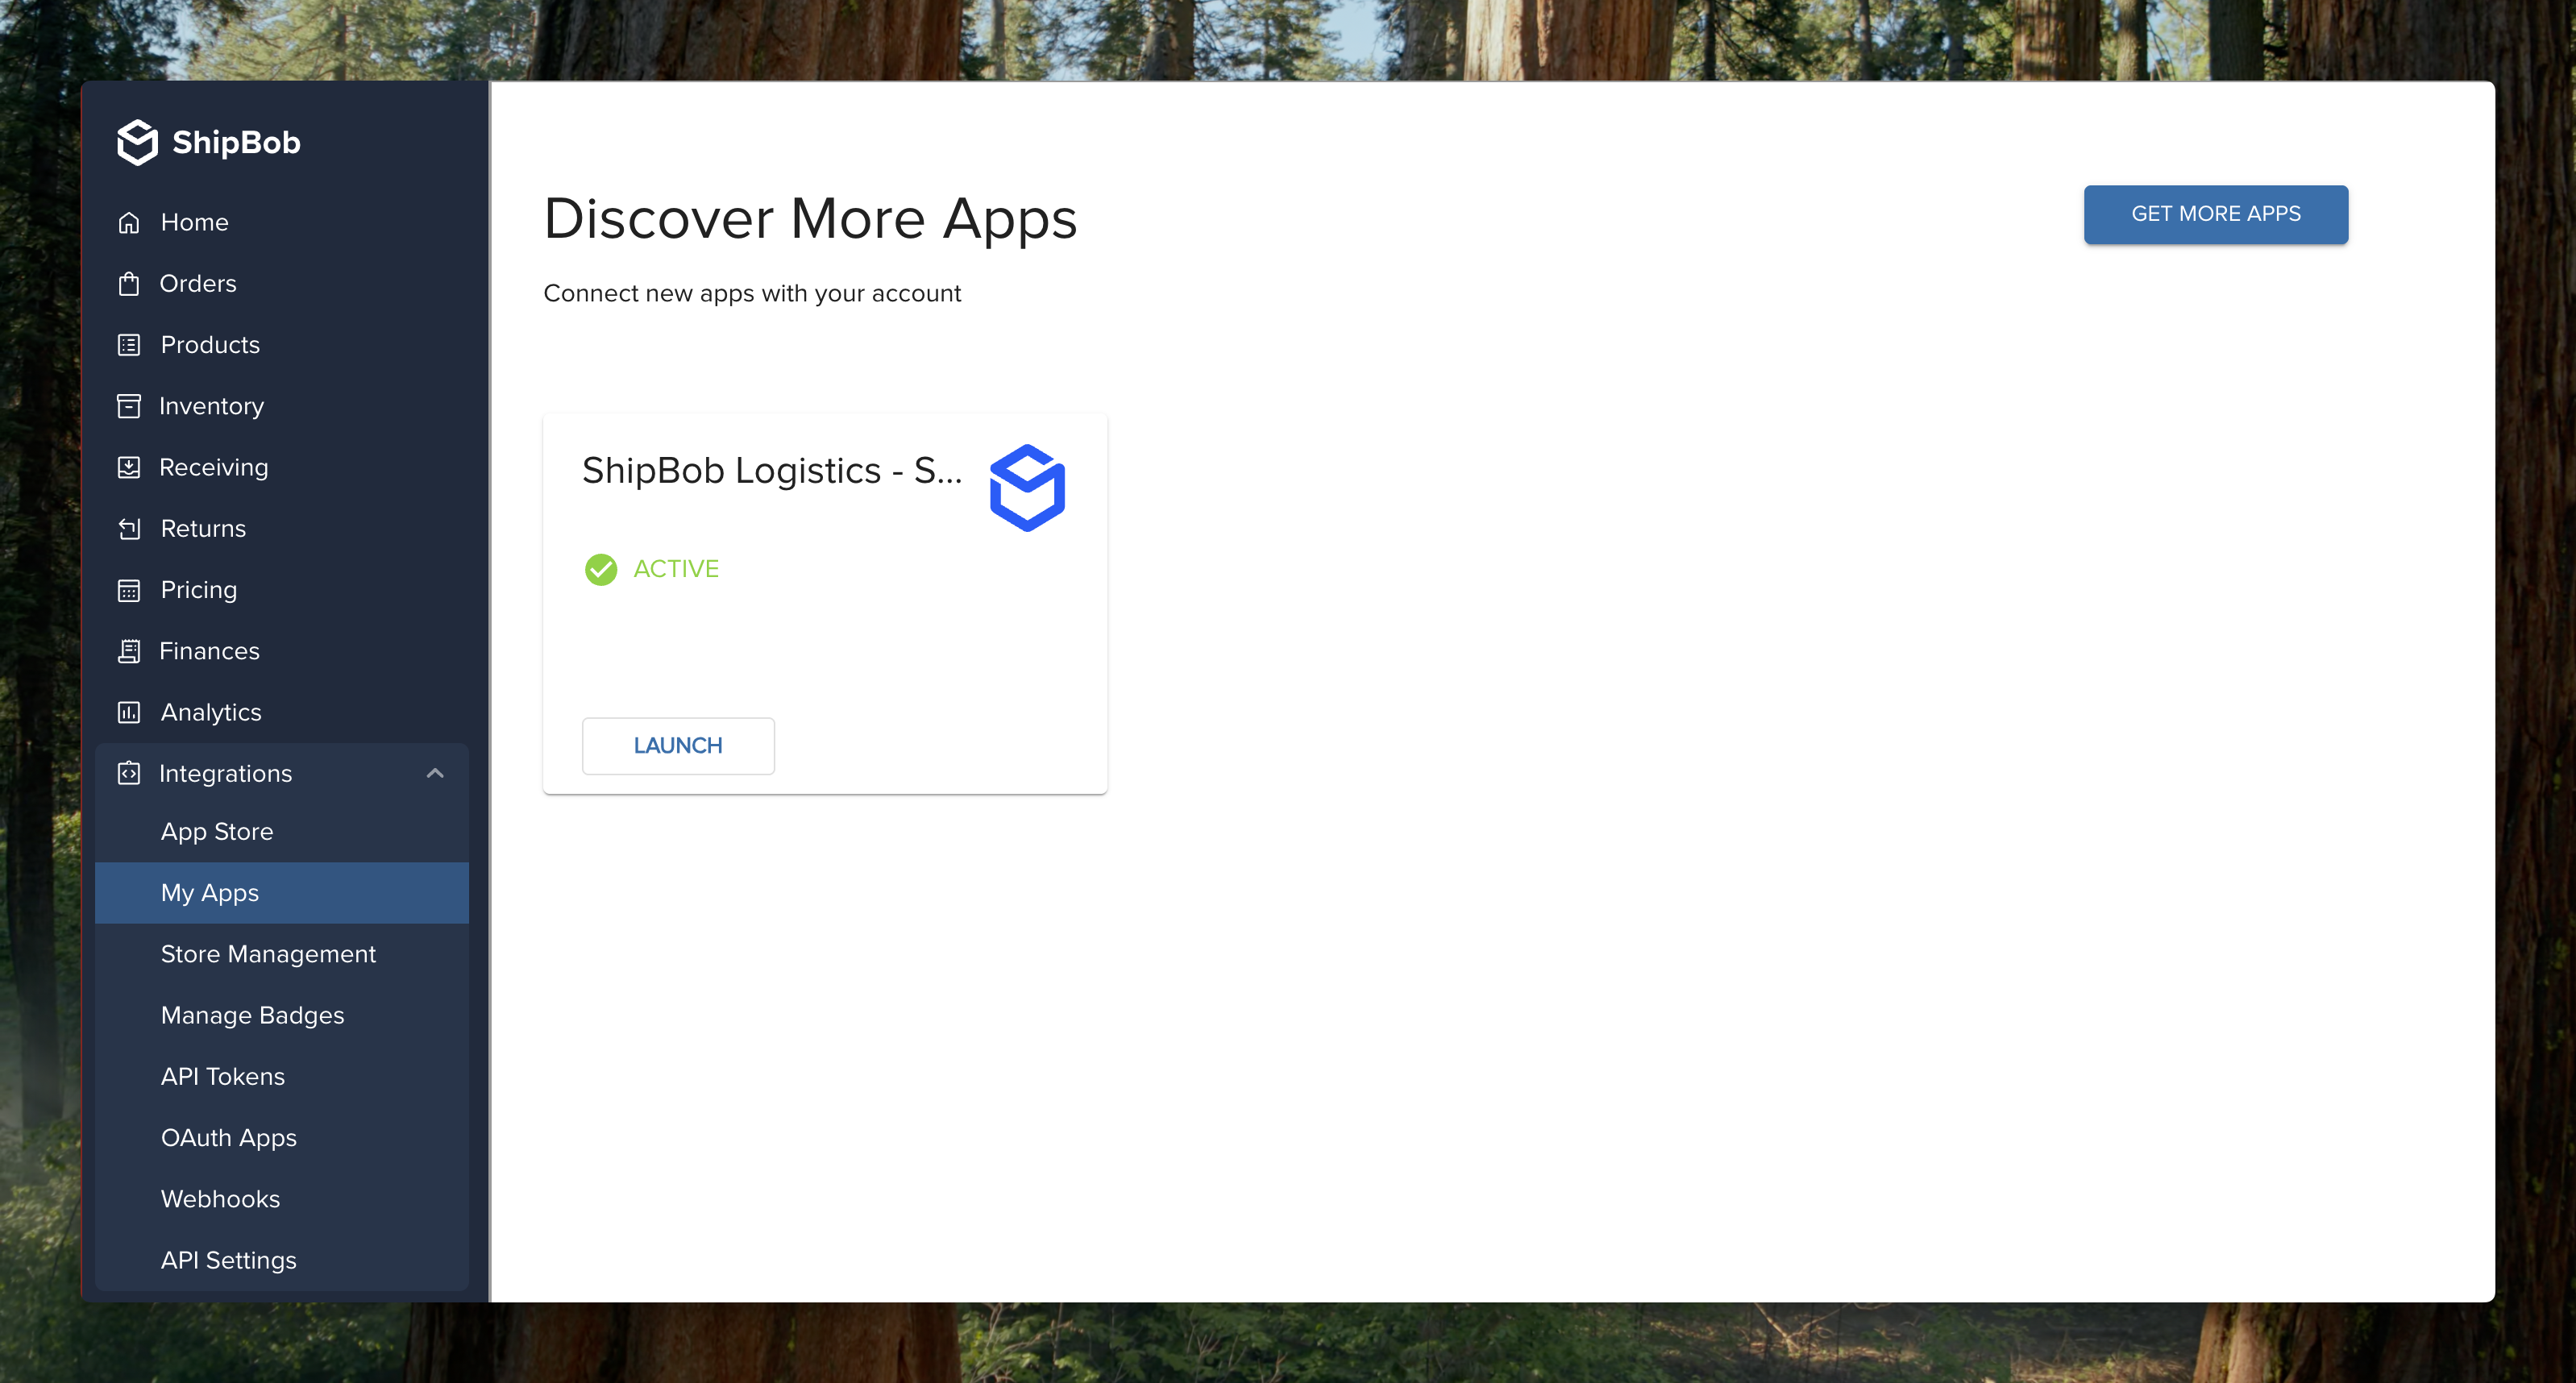
* Log into your ShipBob Dashboard and navigate to **Integrations → My Apps**.
* Find the **Shopify** integration and click **Launch**.
* Click **Manage Settings → Manage** to access the configuration panel.
***
## Need Help?
If you encounter issues or need assistance, please contact the [ShipBob Support Team](https://support.shipbob.com/).
***